¶ 1. Abstract
This manual is intended to guide the integration of T6 Planning with Active Directory Federation Services (ADFS). It provides step-by-step instructions for configuring the integration, starting with prerequisites such as setting up the T6 Planning portal for HTTPS. It then covers certificate configuration, ADFS setup, adding a new Relying Party Trust, configuring URLs, certificates, and authorization rules. The manual also includes information on setting up endpoints, claim issuance rules, and application parameter settings in T6 Planning. It appears to be a detailed guide to ensure effective integration between T6 Planning and ADFS.
¶ 2. Integration with ADFS
¶ 2.1 Overview
This manual aims to provide instructions for configuring the integration of T6 Planning with Active Directory Federation Services.
¶ 3. Prerequisites for Installation
Before starting, it is necessary to configure the T6 Planning portal for HTTPS. For more information, refer to the manual T6 Planning – IIS Configuration Tips, Chapter 3. HTTPS Protocol.
¶ 4. Configurations
¶ 4.1 Configuring a Certificate
If you need to insert a certificate to encrypt data communication with T6 Planning.
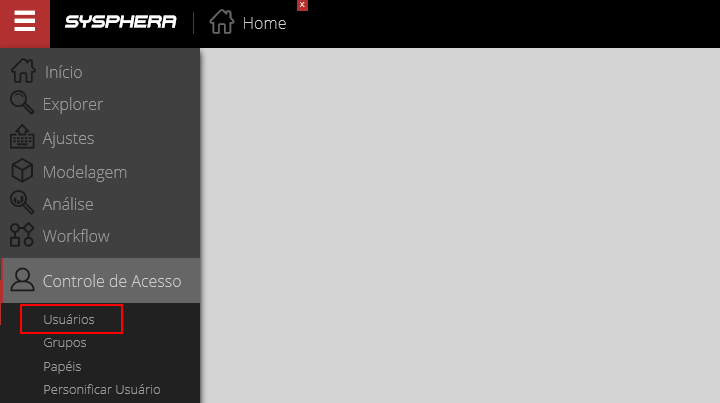
Access the T6 Planning menu and click on Access Control > Users.
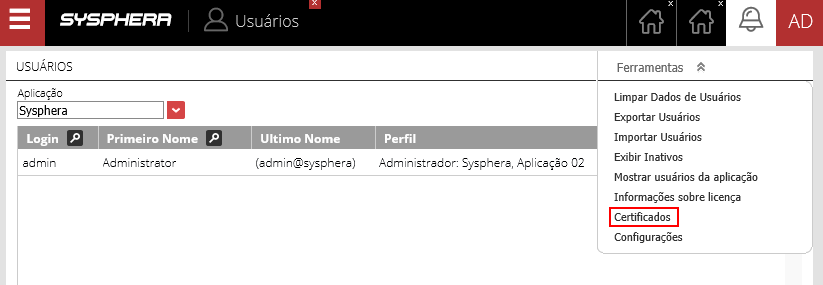
In the Users screen, click on Tools > Certificates.
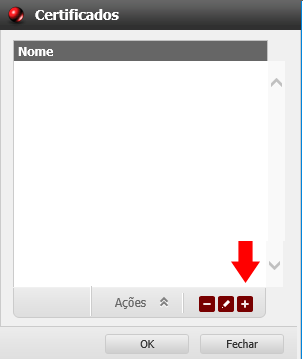
In the Certificate Creation/Edit screen:
- Click the Add button.
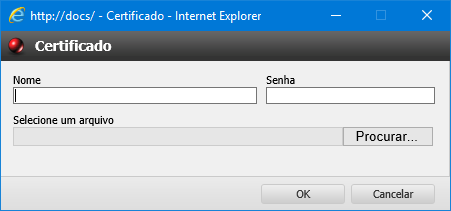
In the Certificate screen:
- In the Name field, give a name to the certificate you will use for configuration.
- Enter the password of the certificate containing a Private Key.
- Then click the Browse button to find the certificate file.
- Finally, click OK.
Note: At this point, use a certificate that contains a Private Key. Later, we will also need the public key of the certificate to use it within ADFS.
¶ 4.2 Configuring ADFS
In the Start Menu, you will find the AD FS Management.

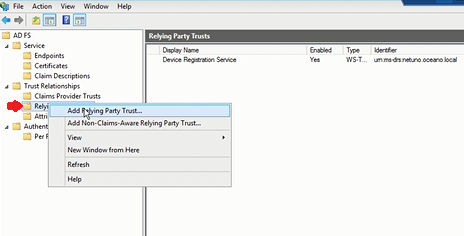
In the ADFS environment, it is necessary to add a new Relying Party Trust for this:
- Right-click on the Relying Party Trust folder, as shown in the image below.
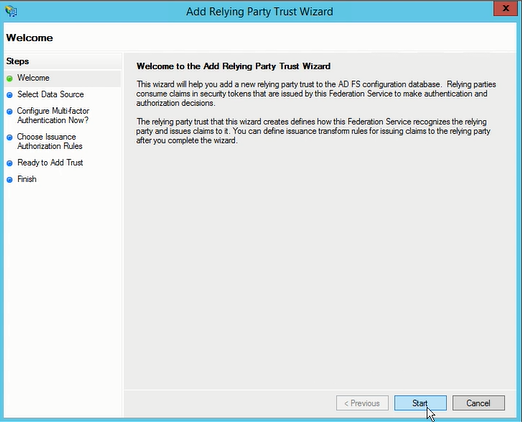
In the Add Relying Trust Wizard screen, click on Start.
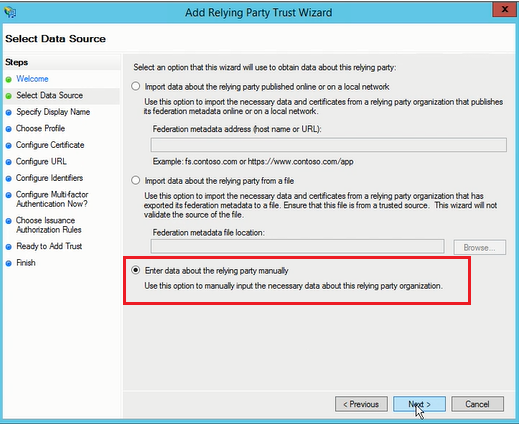
On the next screen, choose the option to manually import metadata settings and click Next, as shown in the image.
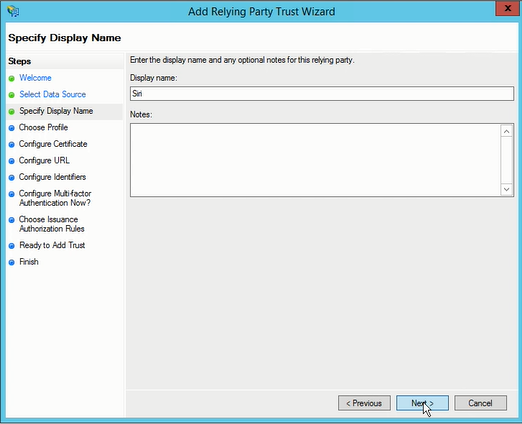
On the next screen, enter a display name and click Next.
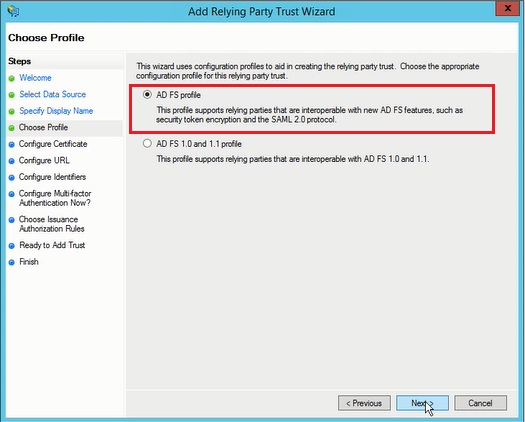
Then choose the ADFS configuration profile.
For this case, we use the SAML 2.0 protocol.
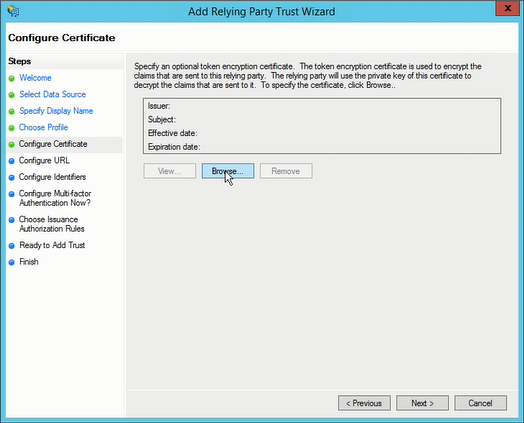
In the next step, if you want to insert a certificate, it is important to note that it must be a public key type, as mentioned earlier, to encrypt data communication with T6 Planning.
After entering it, click Next.
On the next screen, choose to enable the SAML 2.0 protocol and enter the URL as shown in the image and the note below.
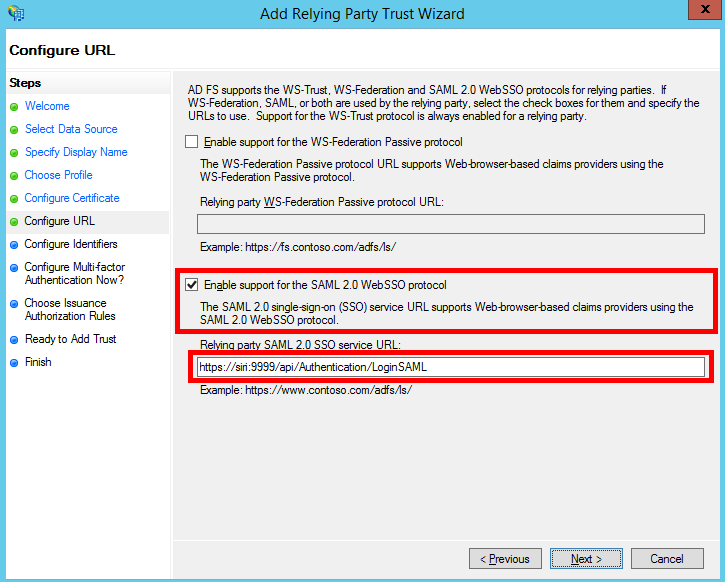
Note: The URL must contain the following data: https//:machine name where T6 Planning UX portal is located/application name/api/authentication/LoginSAML
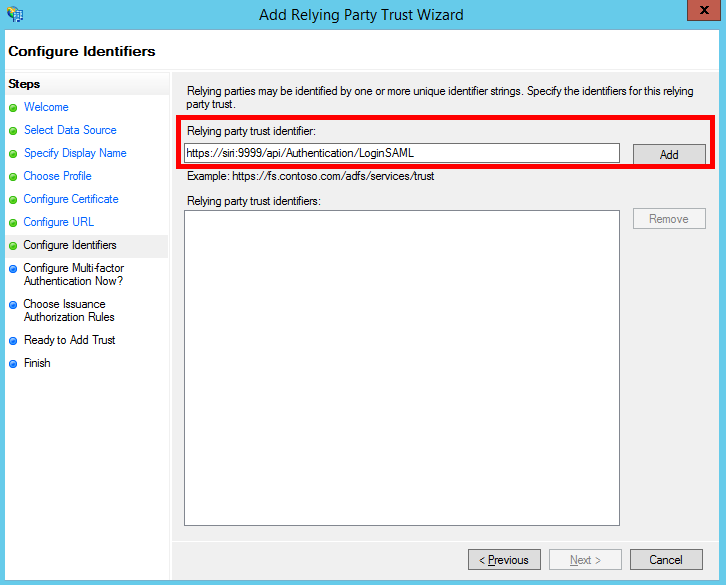
On the next screen, in the Relying Party Trust identifier field, enter the same URL as before and click the Add button, then click Next.
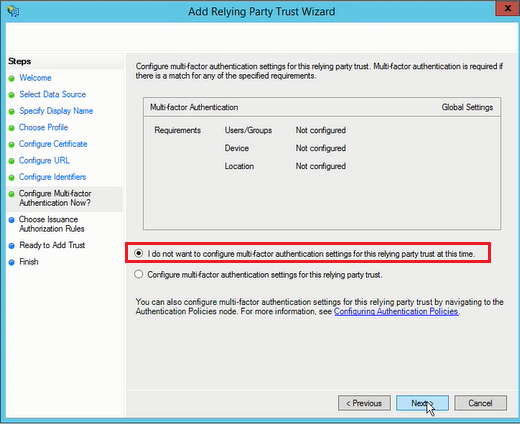
Then keep the choice of not using multi-factor authentication:
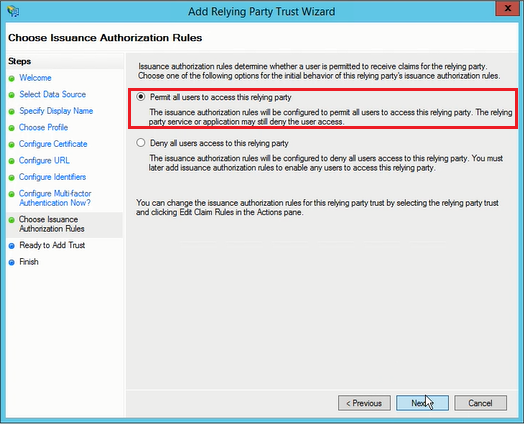
On the next screen, keep the choice of allowing all users. Click Next.
For now, we will not configure the Claims. Click Next.
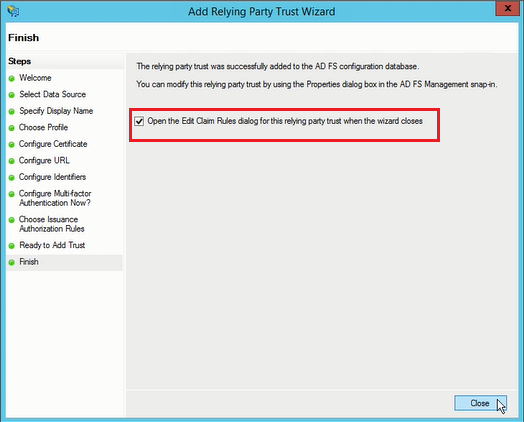
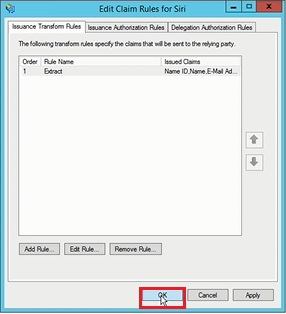
Then uncheck the option highlighted in the red square and click Close.
Upon returning to the initial screen in the new Relying Party Trust created:
- Right-click and choose Properties.
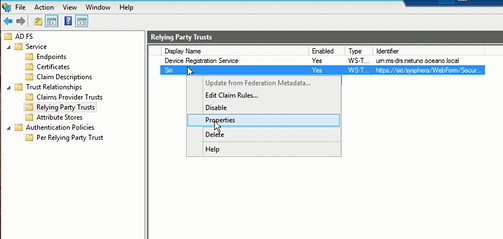
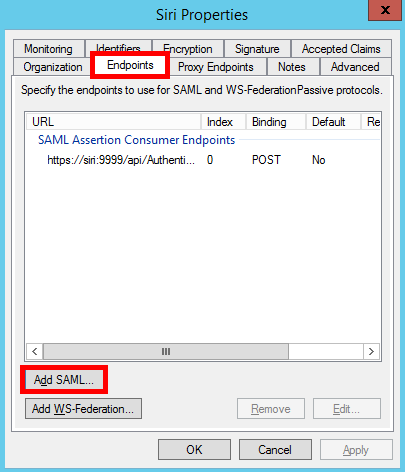
Then, in the Endpoint tab, note that only the login endpoint has been added. It will be necessary to add the Logout endpoint. To do this, click the Add SAML button.
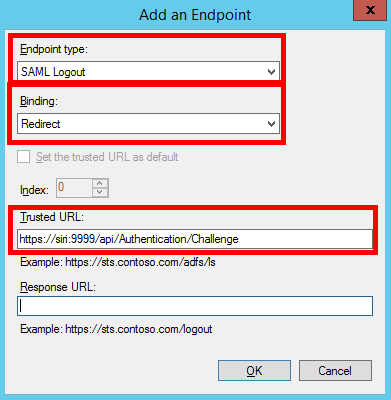
In the Add Endpoint screen:
- In the Endpoint Type field, select SAML Logout.
- In the Binding field, select Redirect.
- In Trusted URL, enter the address as per the example: https//:machine name where T6 Planning UX portal is located/application name/api/authentication/Challenge
- Then click Ok.
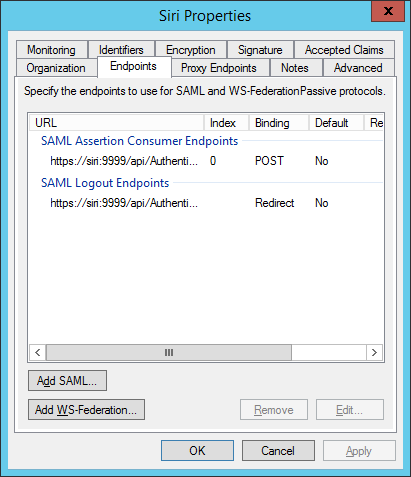
Upon returning to the initial properties screen, click OK.
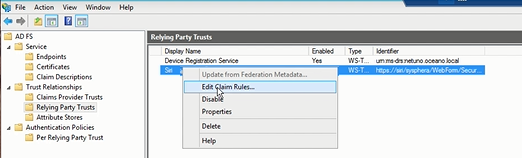
You will be directed to the initial screen in the new Relying Party Trust created.
- Right-click and choose Edit Claim Rules...
In Edit Claim Rules for, in the first tab, click the Add Rule... button.
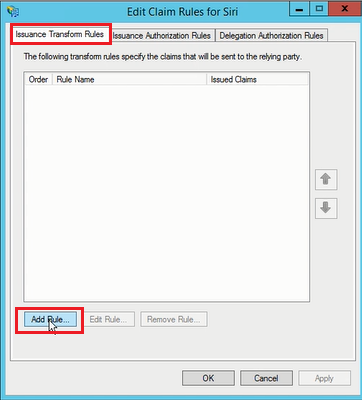
In this window, keep the existing settings and click Next.
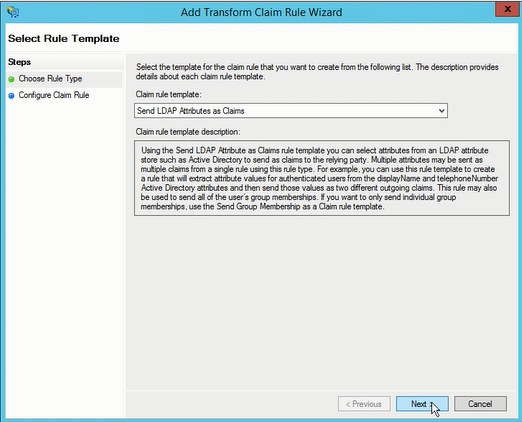
In the Add Transform Claim Rule screen:
- In Claim Rule name, enter a name for this configuration.
- In Attribute Store, choose Active Directory.
- In the Mapping of LDAP attributes to outgoing claim types field, choose the options in the order as shown in the image, with the following options:
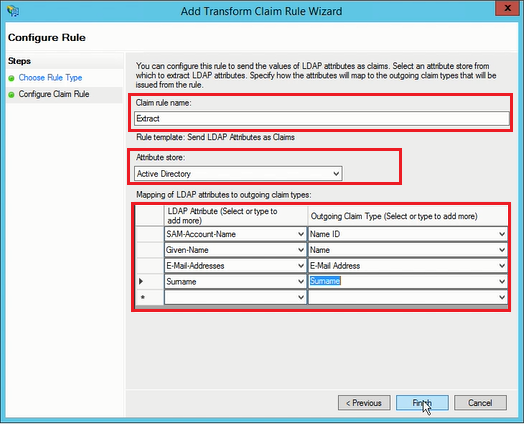
- SAM-Account-Name
- Name ID
This first option is necessary for Single Sign-on only.
If there is no user or you need to create a new one, also enter the three schemas below:
- Given-Name
- Name
- E-mail-Addresses
- E-mail Addresses
- Surname
- Surname
After filling in all the information, click Finish.
Upon returning to the Edit Claim Rules for screen:
- Click OK.
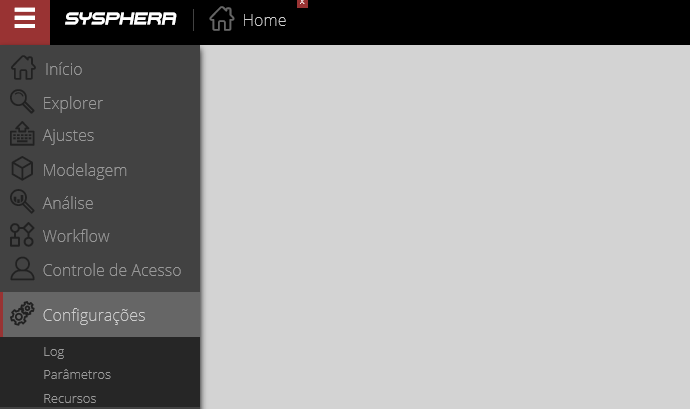
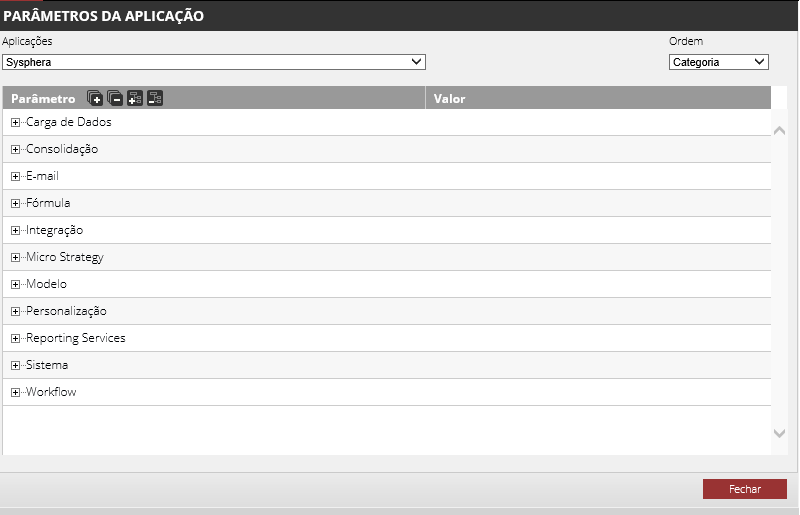
In the T6 Planning initial menu, go to Settings -> Parameters.
In the Application Parameters screen, fill in the parameter values as described below:
-
Authentication Service Provider Entry Link: http://name based on the AD or FS full name/adfs/ls/idpinitiatedSignon.aspx
-
Authentication Service Provider Exit Link: http://name based on the AD or FS full name/adfs/ls/?wa=wsignout1.0
-
Service Provider Type: SAML
-
Certificate for the authentication service provider: If you chose to insert a certificate, enter the name given to the certificate (see page 4). Otherwise, leave this field blank.
¶ 4.2.1 Testing the Configuration
After completing all configurations, when accessing T6 Planning, you will be directed to the ADFS login screen.
- Click Sign In
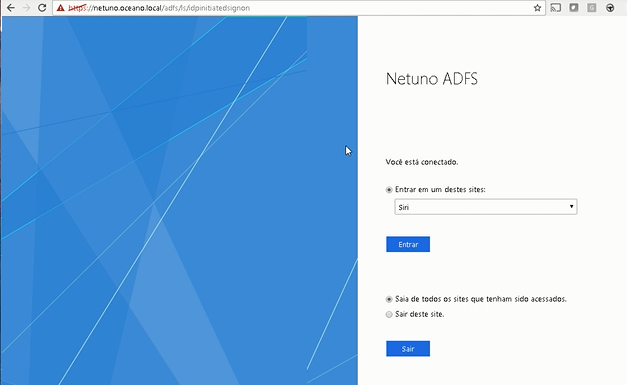
- Then, the T6 Planning initial screen will open, as shown below:
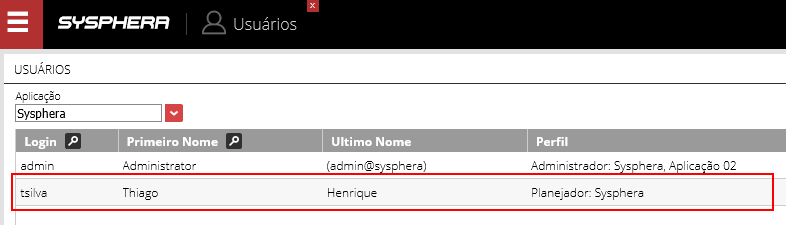
- Upon returning to the Users area, note that a new user has been created.
¶ 5. Resolution of Possible Problems
When trying to log in to ADFS, the T6 Planning UX error screen is displayed.
- Check the REP_NOTIFICATION table in the database; it contains details of possible problems.