¶ 1. Overview
This document aims to provide a practical and detailed guide for the installation of the Power BI Gateway (Standard Mode). The gateway is essential for enabling the connection between Power BI cloud services and your on-premises data sources, such as databases, files, or ERP systems.
The installation will be described step by step, ensuring that all necessary configurations are performed for efficient and secure operation.
This manual is intended for IT administrators or technical users who need to configure the gateway in an organizational environment.
¶ 2. Assumptions and Constraints
¶ 2.1. Assumptions
- The IT environment must be prepared for installation, with administrative privileges on the machine where the Gateway will be installed;
- The machine must have internet access to communicate with Power BI services;
- The responsible user must have an administrative account in Power BI.
¶ 2.2. Constraints
- Installing the Gateway on shared machines is not recommended due to security and performance concerns;
- The Standard mode of the Gateway only supports data sources compatible with on-premises connections and does not include advanced features such as clustering.
¶ 3. Installation
¶ 3.1. Gateway Download
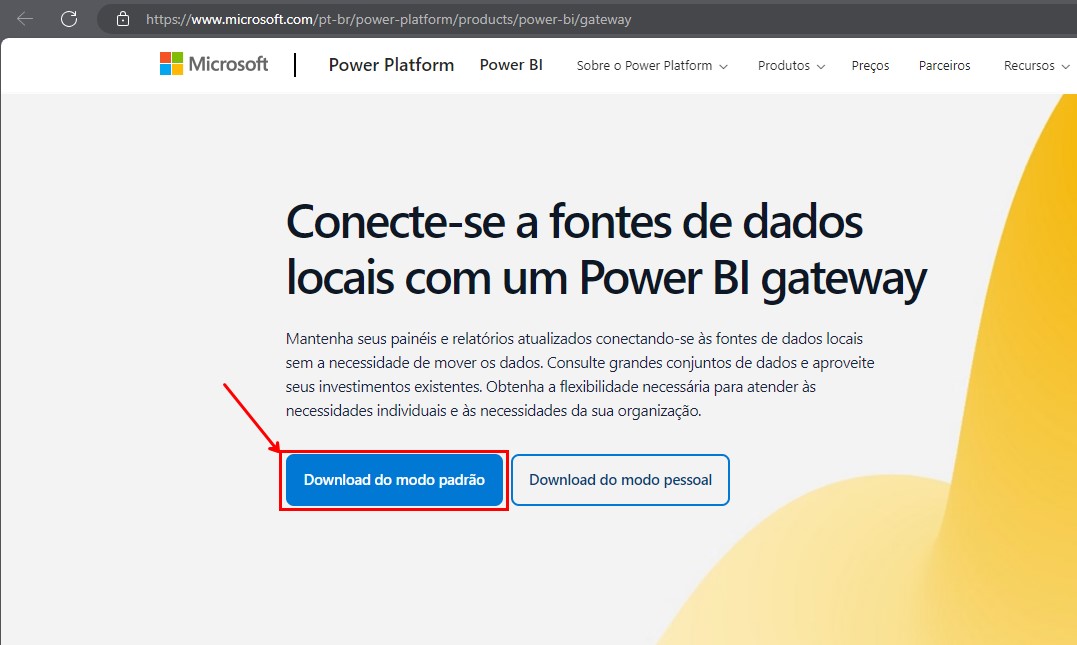
- Access the official Microsoft Power BI link: Power BI Gateway | Microsoft Power BI;
- Click on Download in standard mode.
¶ 3.2. System Requirements
- Operating System: Windows Server 2012 R2 or later, or Windows 10/11 (64-bit);
- RAM: Minimum of 4 GB;
- Processor: Dual-Core, 1.2 GHz or higher;
- Disk Space: 5 GB free.
¶ 3.3. Gateway Installation
- Run the installer as administrator;
- Accept the terms of use and click Next;
- Select the installation directory (keeping the default is recommended);
- Click Install and wait for the process to complete.
¶ 3.4. Configuring the Gateway
- After installation, start the Gateway. The initial configuration screen will be displayed;
- Log in with your Power BI Service account;
An administrative account must be used to configure the Gateway in the Dataset later.

- Choose between Register a new Gateway or Migrate an existing Gateway, depending on the scenario;
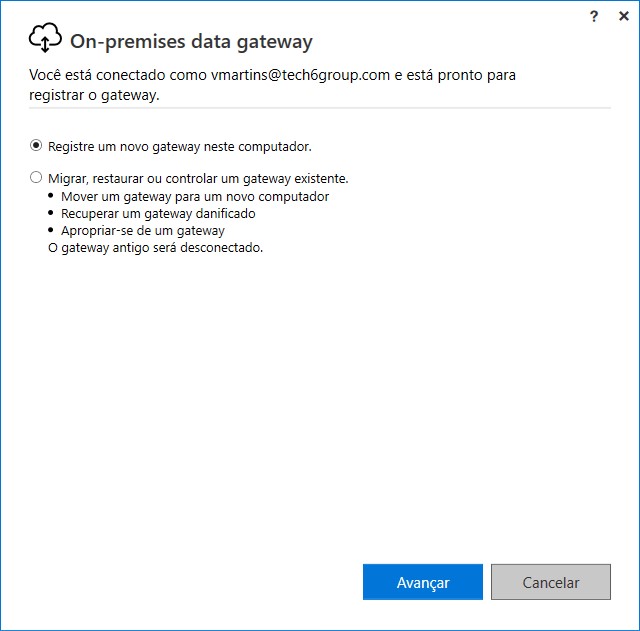
- Name the Gateway and set a recovery password;
- Click Configure.
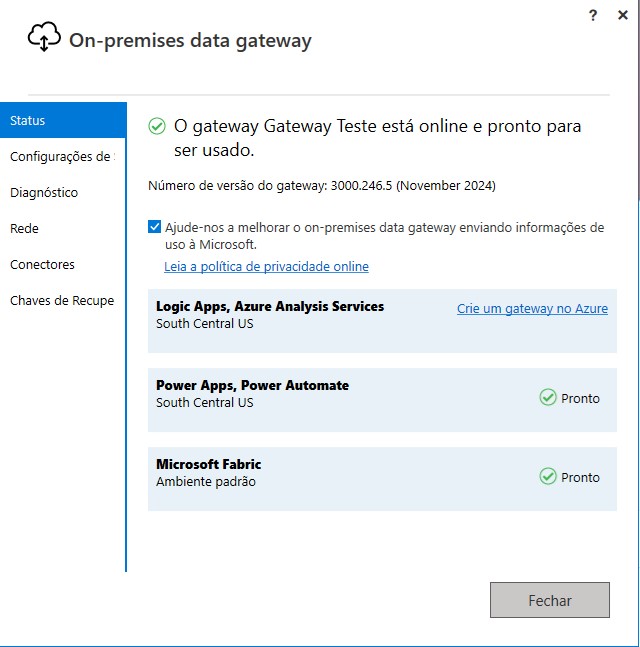
The Gateway will attempt to connect to the Power BI service.

- Once completed, the gateway will be ready to use. You can check the gateway status and make changes by navigating through the options.
¶ 4. Testing the Connection
1. In the Power BI Service portal:
- In the Workspace where the Dataset you want to connect to the Gateway is located, click on
 and go to Settings;
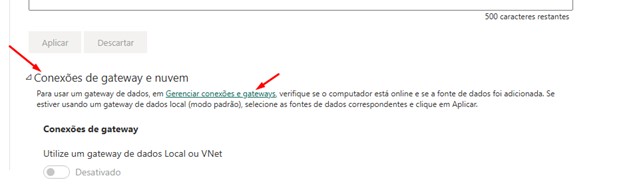
 - In the model settings, click on Gateway and cloud connections → Manage connections and gateways.
2. Add a new data source:
- On the Manage connections and gateways screen, stay on the Connections tab and click New;
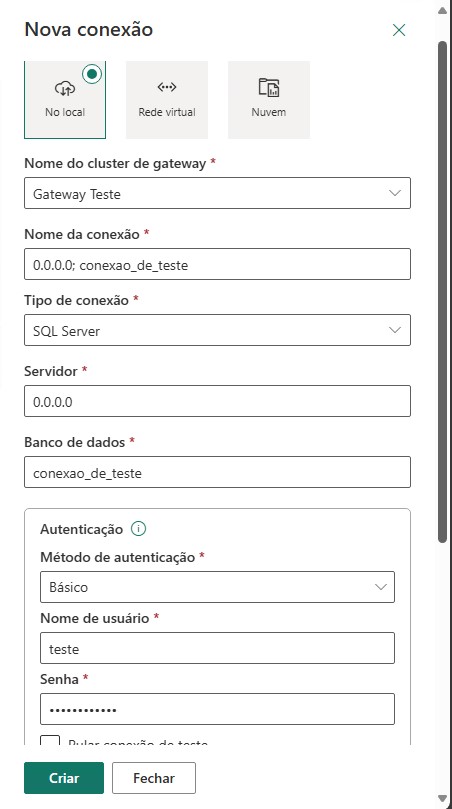
- When you click New, a side window will open to configure the new gateway.
The fields must be filled out as follows:
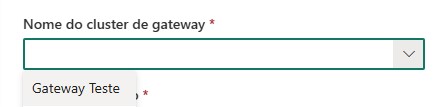
- Gateway cluster name: This field will display the gateway name provided during the configuration, as shown in the image below:
- Connection name: Enter a name for this connection, usually in the format
server;database_name; - Connection type: Select SQL Server, and the next options will be enabled;
- Server: Enter the IP or name of the data server (It must match the Dataset connection);
- Database: Enter the same database name (It must match the Dataset connection);
- Authentication method: Select the authentication method used to connect to the database (Basic, Windows, OAuth 2.0, or Service Principal). After selecting the authentication method, the option to enter the username and password will be enabled according to the chosen method;
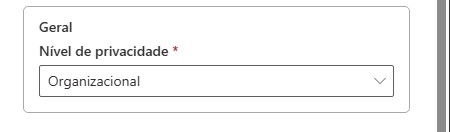
- Privacy level: Set as Organizational;
Example of a completed configuration:
Once all fields are filled in, click Create. A message will appear at the top indicating the creation status. If everything is correct, the message will confirm the successful creation.
3. Mapping the Dataset to the created connection:
- After creating the connection, return to the Dataset Settings page, under the Gateway and cloud connections tab;
- This time, when you expand the Gateway and cloud connections tab, the created gateway will appear in the list of available connections. In the Maps to option, select the connection created for the dataset's database, as shown below:
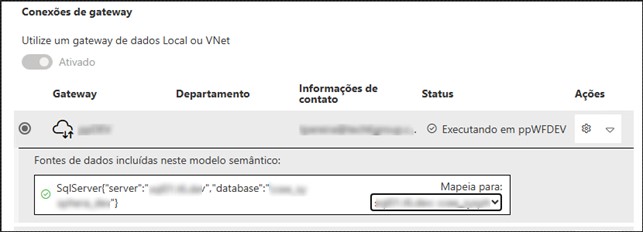
Once done, click Apply, and the dashboard will be online.
¶ 5. Q&A
Frequently Asked Questions
1. What is Power BI Gateway and what is it used for?
Power BI Gateway is a component that enables the connection between Power BI cloud services and on-premises data sources. It works as a bridge to access data located inside the corporate network.
2. What are the minimum system requirements for Power BI Gateway?
The minimum requirements for using Power BI Gateway are:
Operating System: Windows Server 2012 R2 (or later) or Windows 10/11 (64-bit);
RAM: Minimum 4 GB;
Processor: Dual-Core 1.2 GHz (or higher);
Disk space: 5 GB of free space.
3. Can I install Power BI Gateway on any machine?
Due to security and performance concerns, installing Power BI Gateway on shared machines is not recommended.
The machine must have internet access and administrative privileges.
4. Where can I download Power BI Gateway?
You can download it directly from the official Microsoft Power BI website: Power BI Gateway | Microsoft Power BI.
5. Which account should I use to configure Power BI Gateway?
To configure Power BI Gateway, use a Power BI Service administrator account that will later be used to configure the Gateway in the Dataset.
6. How do I define the Gateway name for Power BI?
After installation, during the initial setup, once you sign in with the Power BI Service administrator account, you can give the gateway a custom name and define a recovery password.
7. What should I enter in the "Server" field during Gateway connection setup for Power BI?
During Gateway setup, after selecting SQL Server as the connection type, fill the "Server" field with the IP address or data server name, the same one used in the Dataset connection.
8. Which privacy level should I choose during Gateway setup for Power BI?
We recommend selecting Organizational as the privacy level.
9. How can I tell if Power BI Gateway is working correctly?
After setup, you can check gateway status in the Power BI administration interface and verify whether the connection to Power BI Service was established.
10. What should I do if the connection fails during testing?
Check whether all fields were filled correctly (server, database, credentials), whether the machine has internet access, and whether the authentication credentials are correct.
11. How do I map a Dataset to use the Gateway?
In Power BI, in Dataset settings, under Gateway and cloud connections, select the created connection in the Maps to field and click Apply.
Once done, click Apply, and the dashboard will be online.
¶ 5. Q&A
Frequently Asked Questions
1. What is the Power BI Gateway and what is it used for?
The Power BI Gateway is a component that enables the connection between Power BI cloud services and on-premises data sources. It works as a bridge to access data inside the corporate network.
2. What are the minimum system requirements for the Power BI Gateway?
The minimum requirements to use the Power BI Gateway are:
Operating System: Windows Server 2012 R2 (or later) or Windows 10/11 (64-bit);
RAM: Minimum 4 GB;
Processor: Dual-Core 1.2 GHz (or higher);
Disk space: 5 GB of free space.
3. Can I install the Power BI Gateway on any machine?
Due to security and performance concerns, installing the Power BI Gateway on shared machines is not recommended.
The machine must have internet access and administrative privileges.
4. Where can I download the Power BI Gateway?
The download is available directly on the official Microsoft Power BI website: Power BI Gateway | Microsoft Power BI.
5. Which account should I use to configure the Power BI Gateway?
To configure the Power BI Gateway, you must use a Power BI Service administrator account that will later be used to configure the Gateway in the Dataset.
6. How do I define the Gateway name in Power BI?
After installation, during the initial configuration, after signing in with the Power BI Service administrator account, you can assign a custom name to the gateway and define a recovery password.
7. What should I enter in the connection "Server" field during Gateway configuration in Power BI?
During Gateway configuration, after setting the connection type to SQL Server, in the "Server" field you must enter the IP address or name of the data server, matching the one used in the Dataset connection.
8. Which privacy level should I choose during Gateway configuration in Power BI?
We recommend selecting Organizational as the privacy level.
9. How can I tell whether the Gateway in Power BI is working correctly?
After configuration, you can check the gateway status through the Power BI administration interface and verify that the connection with Power BI Service has been established.
10. What should I do if the connection test fails?
Check that all fields were filled in correctly (server, database, credentials), that the machine has internet access, and that the authentication credentials are correct.
11. How do I map a Dataset to use the Gateway?
In Power BI, in the Dataset settings under Gateway and cloud connections, select the created connection in the Maps to field and click Apply.