¶ 1. Abstract
The provided text details a step-by-step guide for creating an application in Power BI, configuring Azure Active Directory, creating a workspace in Power BI, and setting up integration in T6 Planning. It provides detailed instructions with screenshots on how to perform these tasks, including application creation, access configuration, group creation, permissions management, and integration parameter configuration for the T6 Planning product.
For On Premise integration, with own licensing, a Power BI Embedded or Power BI Premium license is required, as described by Microsoft in the following link: Power BI | Microsoft
¶ 2. Create Application in Power BI
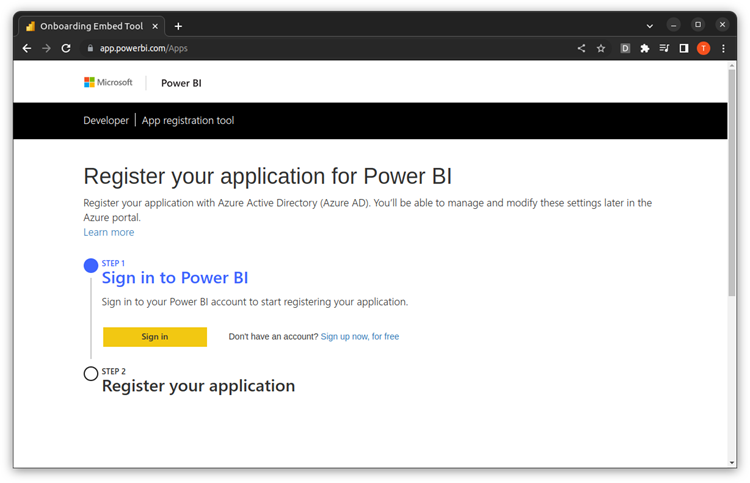
- Access https://app.powerbi.com/Apps.
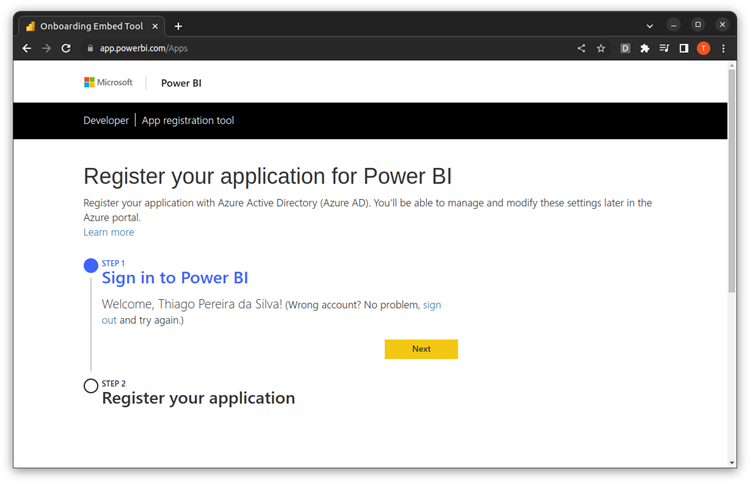
- Sign in with the registered account.
- Click Next.
- Fill out the form fields:
- Application Name: PBI
<Client> <ENVIRONMENT>
E.g., PBI ClientName PRD - Application Type: Native (for apps that run on client devices, such as Android, iOS, Windows, etc.)
- API Access: Select all
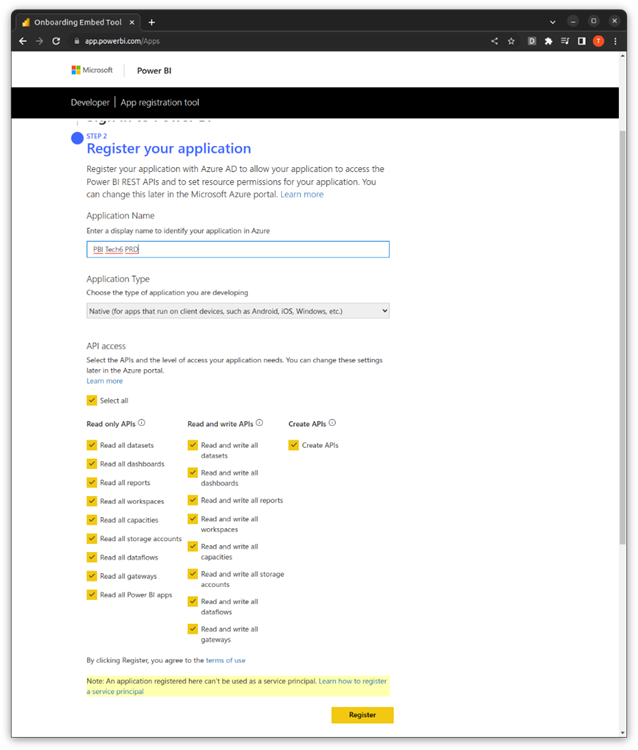
- Application Name: PBI
- Click Register. Save the Application ID value.

¶ 3. Azure Active Directory (AAD)
- Access AAD on Azure Portal https://aad.portal.azure.com.
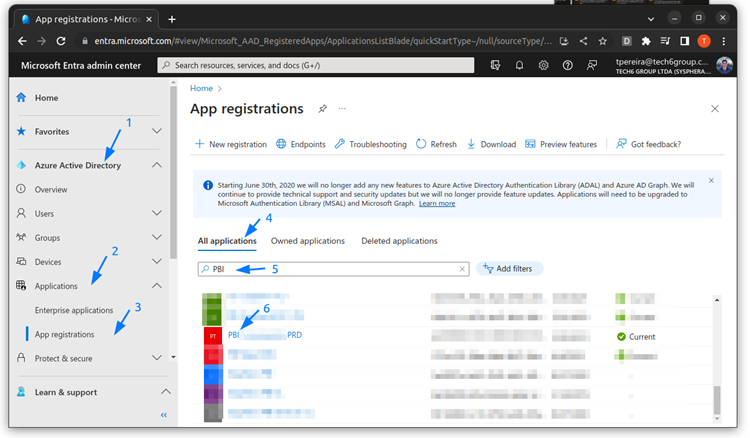
- Access App Registrations:
- Click Azure Active Directory.
- Click Applications.
- Click App Registrations.
- Click All Applications.
- Enter the name of the application created in Power BI.
- Click on the application.
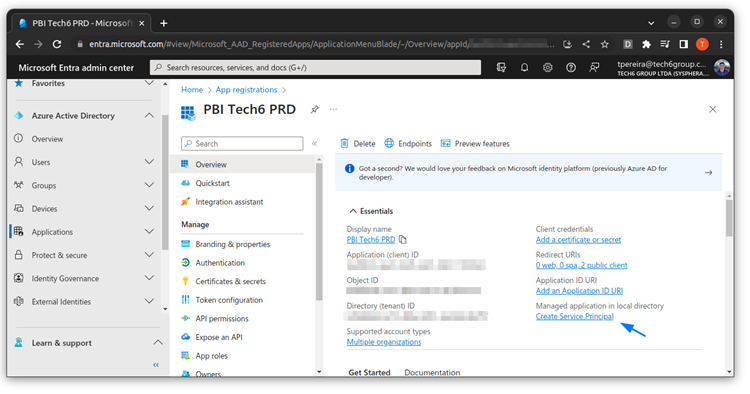
- Create the Service Principal:
- Save the Directory (tenant) ID value.
- Click Create Service Principal.
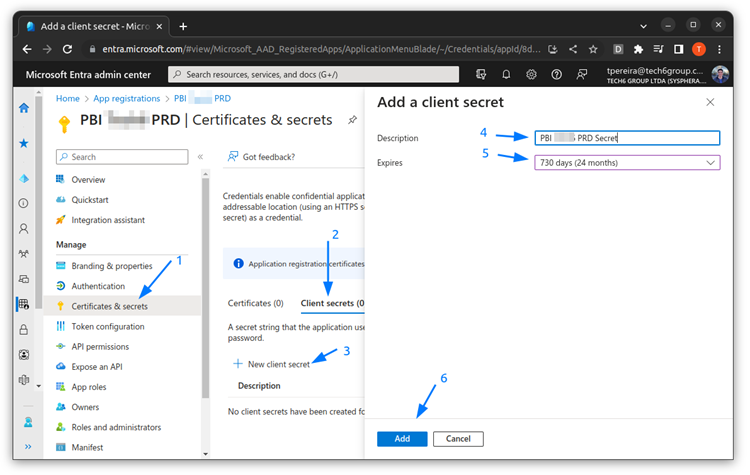
- Create the Secret:
- Click Certificates & Secrets.
- Click Client Secrets.
- Click New client secret.
- Enter a name for the Secret similar to the Power BI app. E.g., PBI Client PRD Secret
- Select 730 days (24 months) option.
- Click Add.
- Save the newly created Secret:
- Save the Secret Value.
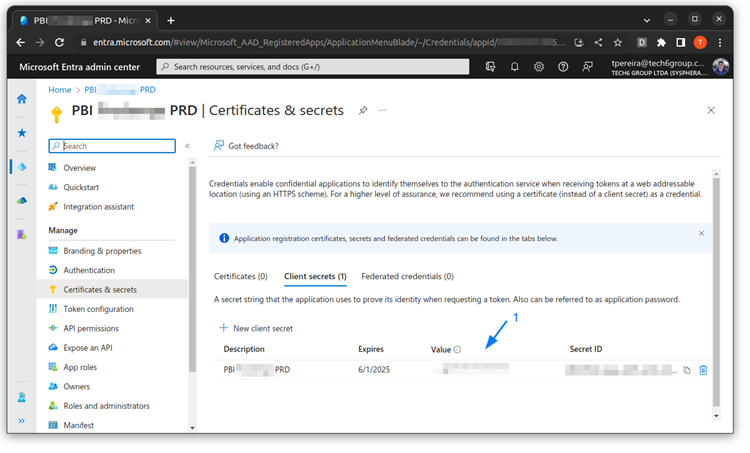
- Save the Secret Value.
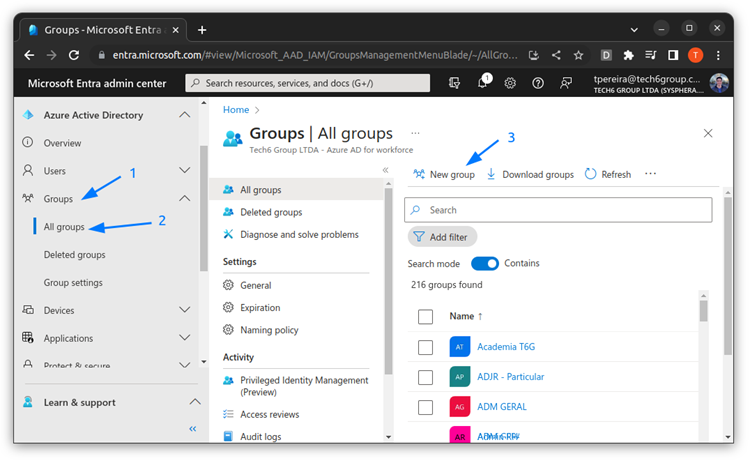
- Access the Groups screen and start creating a new group:
- Click Group.
- Click All groups.
- Click New group.
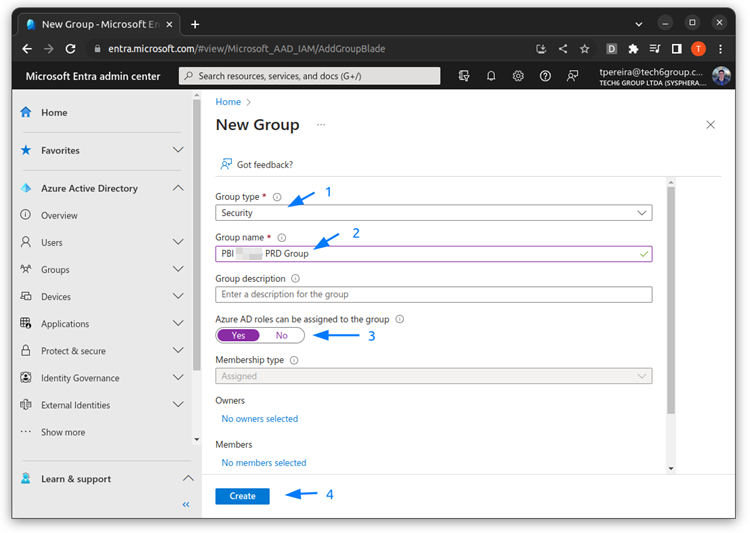
- Create a new Group:
- Select Group type as Security.
- Enter a name for the Group similar to the Power BI app. E.g., PBI ClientName PRD Group
- In “Azure AD roles can be assigned to the group” select Yes.
- Click Create.
- Access the newly created group in the menu Groups > All groups > (search by name).
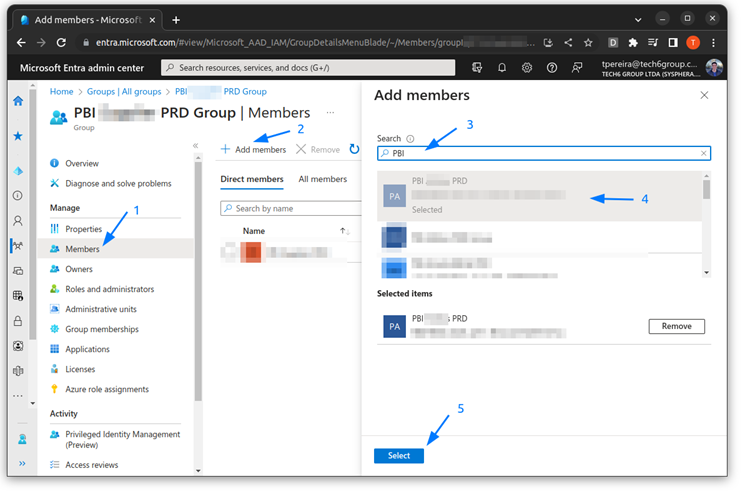
- Add a member to the group:
- Click Members.
- Click Add members.
- Search for the name of the application created in step 2. E.g., PBI ClientName PRD
- Click on the found application name.
- Click Select.
¶ 4. Create Workspace in Power BI
- Access https://app.powerbi.com.
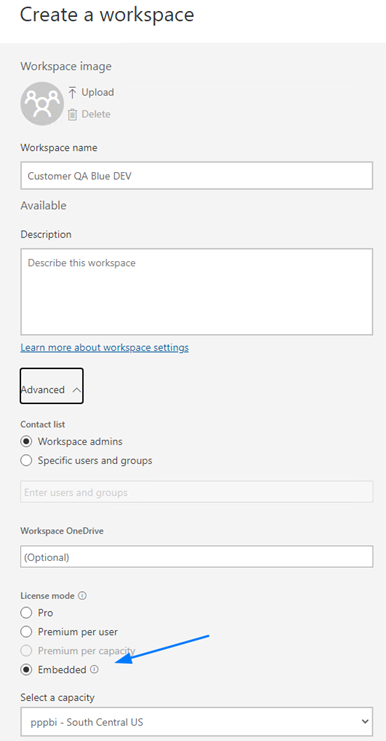
- Create a new workspace:
- Click Workspaces.
- Click + New workspace.

- In workspace creation, select License mode: Embedded and select the Capacity.
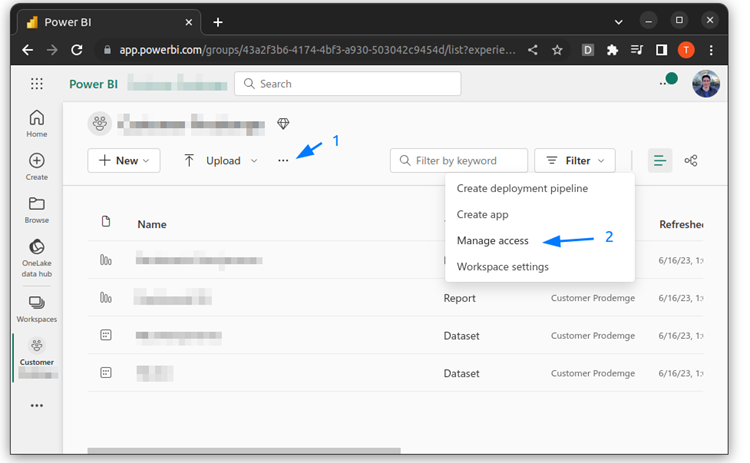
- Add the group created in step 3 to the workspace, with an Admin profile:
- Access the newly created workspace.
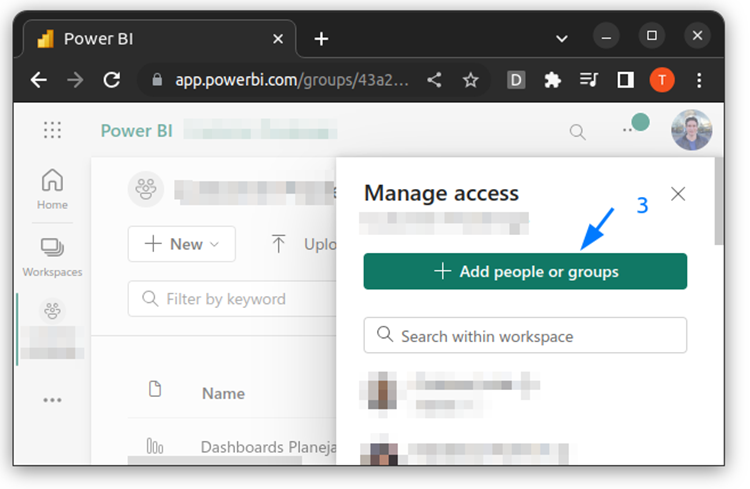
- Click the three dots (...) to show all options.
- Click Manage access.
- Click + Add people or groups.
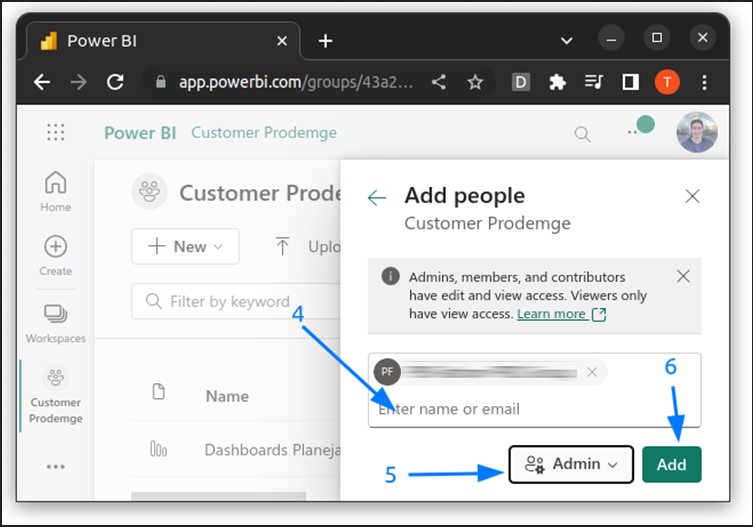
- Search for the group created in step 3. E.g., PBI ClientName PRD Group
- Select the Admin profile.
- Click Add.
- Obtain the Workspace Group ID. Access the workspace in Power BI (https://app.powerbi.com)
- Save the Workspace Group ID value.
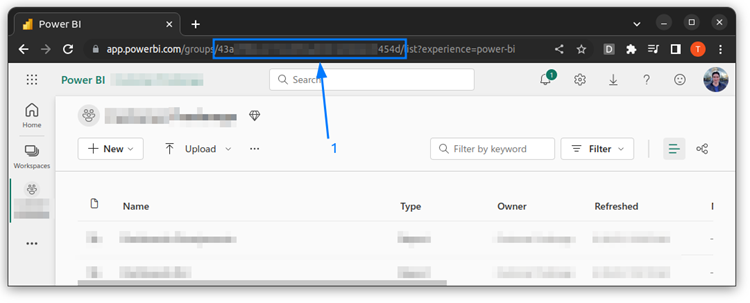
- Save the Workspace Group ID value.
¶ 5. Configure Integration in T6 Planning
- Access the T6 Planning application.
- Access the Parameters menu and then Integration.
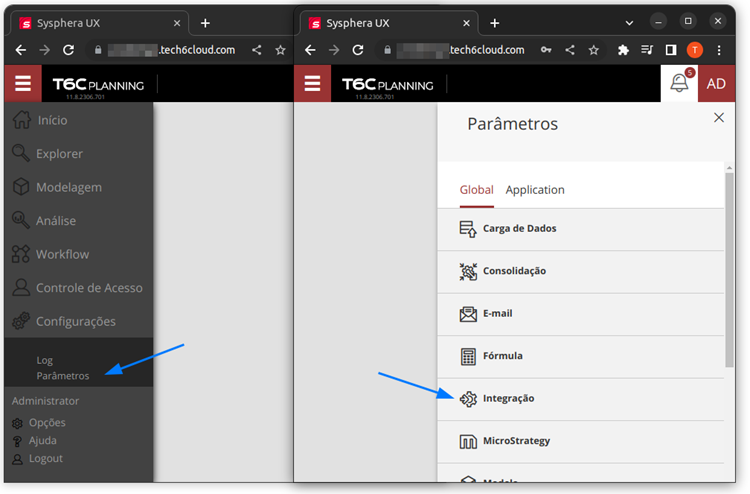
- Configure the integration:
- Report - Client Secret: Secret Value (Obtained in step 3)
- Report - ClientID: Application ID (Obtained in step 2)
- Report - GroupID: Workspace Group ID (Obtained in step 4)
- Report - Integration: Yes
- Report - TenantID: Directory (tenant) ID (Obtained in step 3)
- Report - API URL: https://api.powerbi.com/
- Report - Authorization URL: https://login.microsoftonline.com/{0}
- Report - Resource URL: https://analysis.windows.net/powerbi/api