¶ 1. Overview
Scenario Simulation in T6 is a powerful tool for testing data changes in a controlled way. With it, you can apply variations to existing data in a practical and safe manner, ensuring flexibility in analyses.
However, it is essential to review the parameters before using it, as changes are permanent and directly impact the defined scope.
To prevent errors, when using the simulation tool, make a copy of the scenario you want to simulate and apply the simulation to the copied scenario. After applying the simulation, the data will be automatically changed within the defined scope.
With scenario simulation, we can filter which members will have their data changed, and we can also filter the attribute type of the selected member.
For example:
We can take employee salary values from 2025 and simulate a new scenario for 2026 where employee salaries have a 10% increase. To do this, in the Value step, simply enter +10% and click Finish.
¶ 1.1. Prerequisites
To use this tool, the user must have the following Manager Feature enabled under Permissions:
It is also necessary to enable the Preview Feature:
¶ 2. Features
The Scenario Simulation tool allows you to make specific and simulated adjustments to application data. Main features include:
- Simulating changes to existing values, with support for addition, subtraction, and percentage adjustments;
- Filtering members (and attributes) in dimensions so changes are applied only to specific subsets of data;
- Directly applying changes to the selected scenario;
¶ 3. Usage
To use scenario simulation, follow these steps:
1. In the T6 main menu, expand the Analysis section;
2. In the Analysis section, select the Simulations option;
- When you click Simulations, a side panel opens where the simulation is configured;
- In the initial step, use a dropdown to select the Application where the simulation will run;
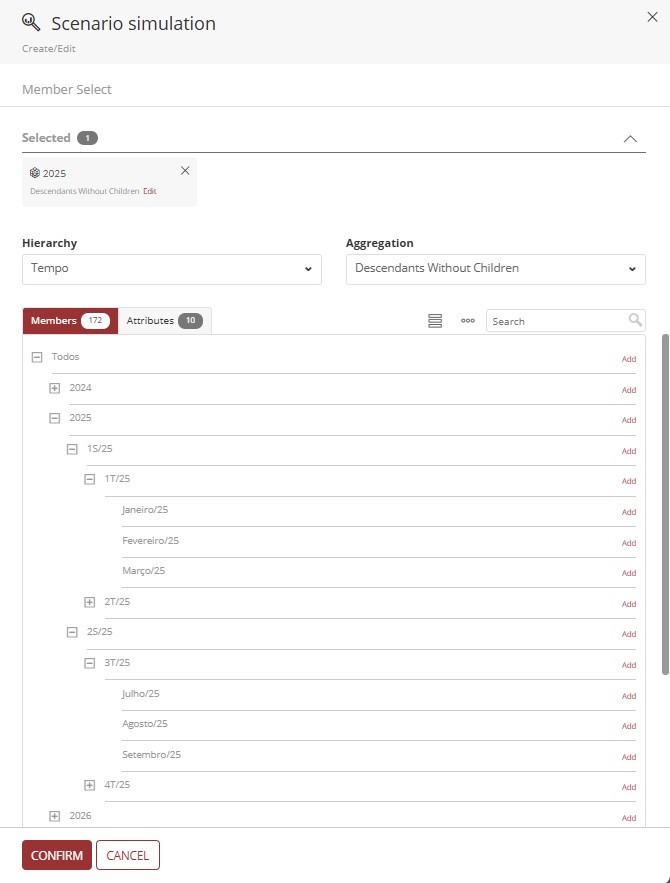
- After selecting the Application, the dimensions available in that application are displayed, where you can define filtering and/or member restrictions;
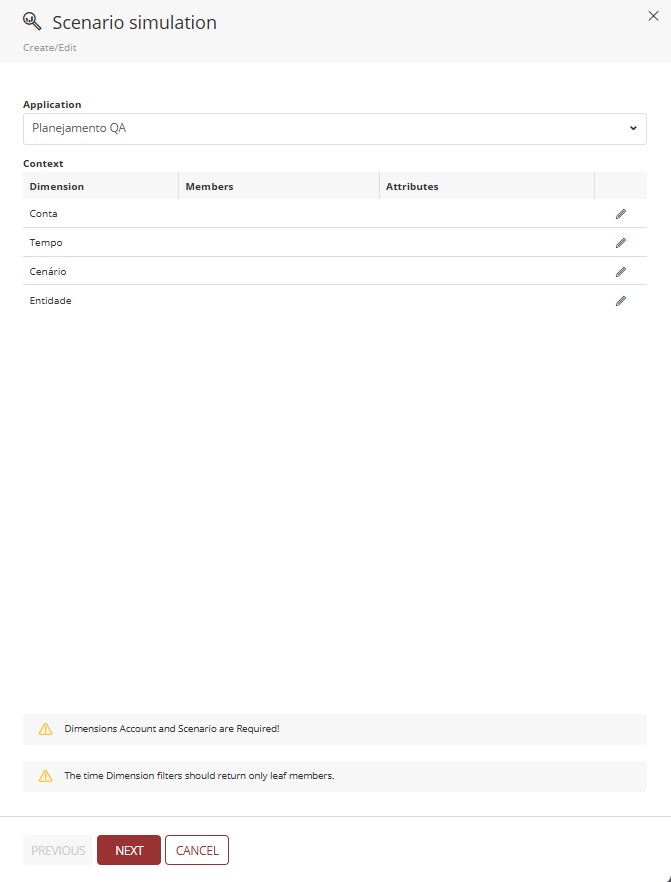
When defining a member in the Filters/Restrictions step, all other non-defined members are excluded. If you want the change to be applied to all members, simply do not define any member*. In this case, the change is applied to all members in the dimension.
The Account and Scenario dimensions must have members defined. It is not possible to continue without selecting at least 1 member in each dimension;
The aggregation type in the Time dimension must return only leaf members;
If member selection is not correct, different messages prevent you from proceeding:
After selecting members in the required dimensions, it is possible to move to the next step.
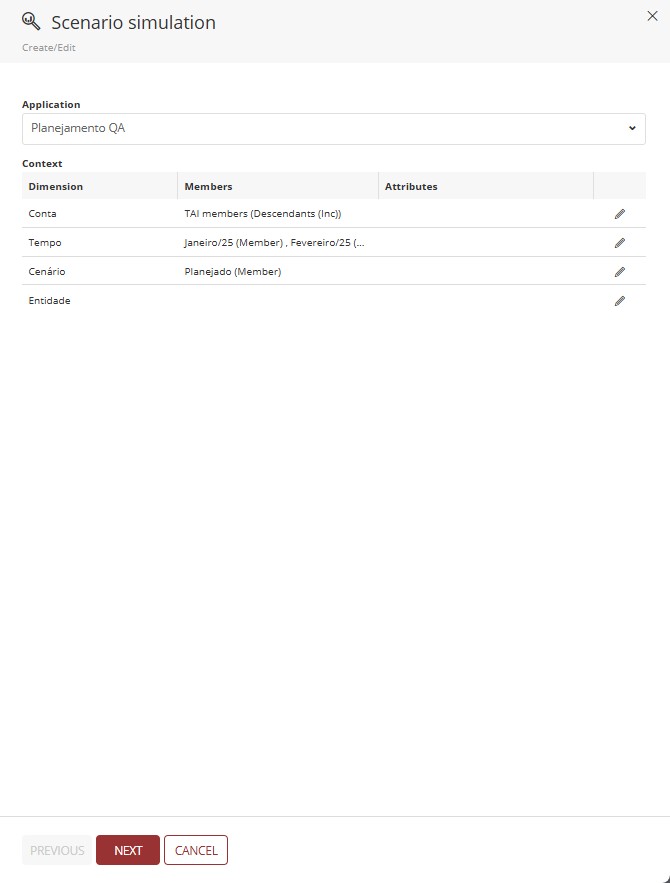
3. Click Next to continue to the next step;
After clicking Next, you move to the Value step, where you define changes to all values within the scope set in the previous step. You can perform the following actions:
- Addition: Enter the addition sign (+) followed by the value to add. For example: +10 adds 10 to existing values;
- Subtraction: Enter the subtraction sign (-) followed by the value to subtract. For example: -10 subtracts 10 from existing values;
- Percentage Increase: Enter the addition sign (+) followed by the value and a percentage sign (%) at the end. For example: +10% adds 10% to existing values;
- Percentage Decrease: Enter the subtraction sign (-) followed by the value and a percentage sign (%) at the end. For example: -10% reduces existing values by 10%;
In this step, you must define an operation and a value;
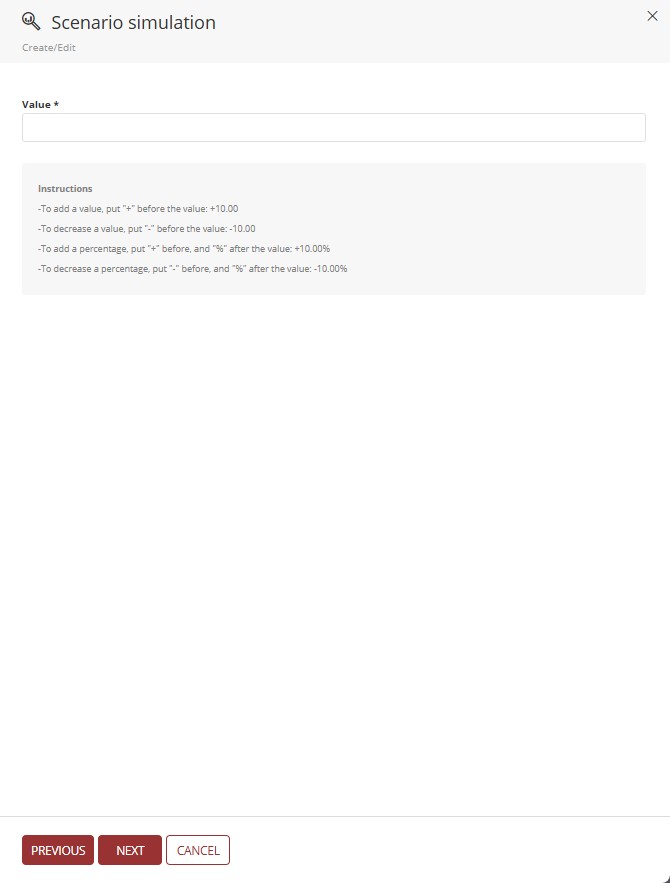
If the entered value or operation is invalid, an informational message is displayed and progression is blocked.
4. After defining the value and operation, click Next to move to the Summary step;
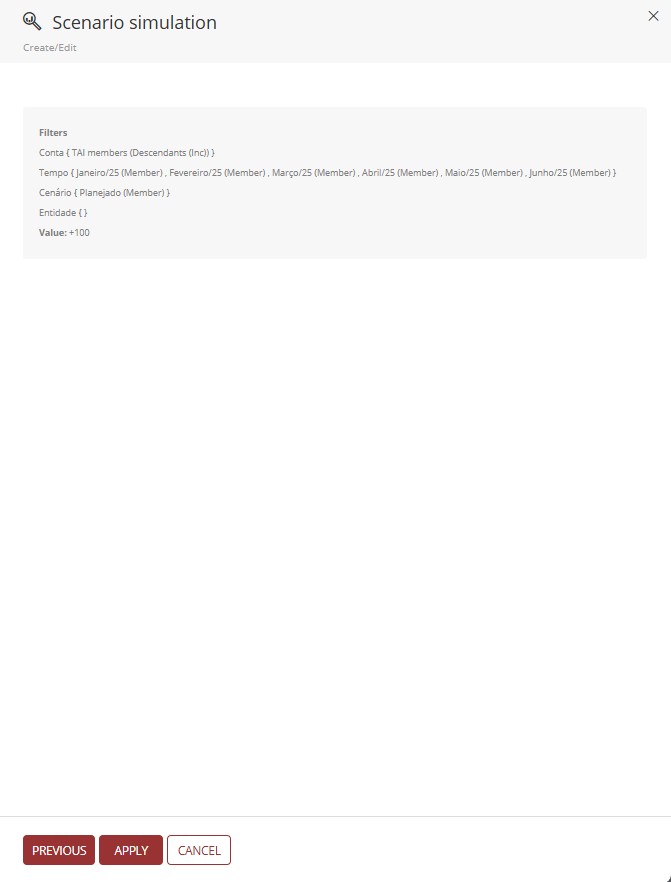
In the summary step, you can review the dimensions, the filters and/or restrictions applied to them, and the defined value and operation;
It is important to review the data because after clicking Apply, changes will be executed.
5. If the simulation runs successfully, a notification is displayed in the notifications panel indicating simulation processing.

- You may also see a notification indicating execution completion with failures, which can be inspected by expanding the notification message.

If simulation execution takes longer than expected, you can cancel it in notifications by pressing the Cancel button next to the progress bar.
¶ 4. Q&A
Frequently Asked Questions
1. Which features are required to use the Simulation tool in T6?
To use the Simulations tool in T6, the user must have the manager feature Manage the application structure/model enabled.
It is also necessary to enable the preview feature New Scenario Analysis.
2. Are changes made through simulation reversible?
No, changes made through simulation are permanent and directly impact the defined scope. Therefore, it is recommended to create a copy of the scenario before applying the simulation.
3. How can I test a simulation without affecting original data?
To test a simulation result without affecting original data, create a copy of the scenario you want to simulate and apply the simulation to that copied scenario.
4. Which operation types can I perform in simulation?
Through simulation, you can perform the following operations:
Addition (+): +10 (e.g., adds 10 to values)
Subtraction (-): -10 (e.g., subtracts 10 from values)
Percentage increase (+x%): +10% (e.g., increases by 10%)
Percentage reduction (-x%): -10% (e.g., reduces by 10%)
5. Is it mandatory to define values in simulation?
Yes. To execute a simulation, the user must mandatorily define an operation and a value in the "Value" step.
6. Do I need to select members in all dimensions for simulation?
To execute a simulation, the requirements below must be met:
The Account and Scenario dimensions are mandatory - you must select at least 1 member in each.
For other dimensions, if no members are defined, the change is applied to all members in that dimension.
7. In simulation, what restrictions apply to the Time dimension?
To use simulation, the aggregation type in the Time dimension must return only leaf members.
You cannot update a closed month.
8. How do I access the simulation tool?
To access the simulation tool, follow these steps:
- In the T6 Main Menu, expand the Analysis section;
- Select the Simulations option;
- A side panel opens, where you can configure and run the simulation.
9. How many steps are in the simulation process?
The simulation process in T6 has 3 main steps:
Filters/Restrictions;
Value;
Summary.
10. How do I know if simulation executed successfully?
After completing the required settings and saving the simulation, you will receive a notification in the notifications panel indicating processing status. You may receive either a success notification or a completion-with-failures notification (visible by expanding the message).
11. Where can I view data changed by simulation?
After running the simulation, you can view changed data through Forms within T6.