¶ 1. Overview
The audit consists of saving details about changes and/or actions performed on any data considered critical within the T6 solution. Critical data includes, for example, any change on the Security screen or any value alteration in form cells.
This information is audited so that, at any moment, it is possible to identify who performed a certain change or what the impact of the change was on the model, in terms of performance.
¶ 1.1. Types of Audit
List of information audited by T6:
- Security: Modifications to user, group, and role data are recorded. Changes to access rights for T6 functions, applications users can access, and permissions in Reports and Forms are also recorded;
- Audit Trail: Modifications to values in form cells are recorded;
- Cell Detail Audit: Modifications to the Cell Details of forms are recorded;
- Cell Value Detail Audit: Modifications to values in the cell value details of forms are recorded, allowing changes and calculation operations in the selected cell;
- Data Table Audit: Information about changes to T6 data tables is recorded;
- Object Logs: Information about the execution of objects in T6 is recorded;
- Formula Logs: Information about formula executions is recorded;
- Error Logs: Any error not handled by the T6 interface is recorded;
- Model History: Information about changes in the model is recorded;
¶ 2. Usage
With the implementation of audits within T6, we can ensure data integrity, track user actions, and generate detailed reports for analysis and decision-making.
¶ 2.1. Security
To use the Security Audit tool, the user must be added to a Global Group, with the following Manager Feature enabled:
Modifications related to the creation, editing, and deletion of users, groups, and roles are recorded. Changes to access rights for T6 functions, applications users can access, and permissions on objects are also recorded.
T6 audits any changes to the information on the Security screen.
This information, for security reasons, is not visible within the tool. To access it, access to the T6 database is required.
By default, security auditing is enabled during T6 installation.
To enable or disable security auditing, follow these steps:
- In the main T6 menu, under Settings, access the Parameters option;
- A panel will open on the side with global and application parameters. Use the Global one;
- Select the option
 and locate the parameter Enable Security Audit;
 - To enable the parameter, the switch button must be set to
 ;
; - To disable the parameter, the switch button must be set to
 ;
;
To view the Security Audit, follow these steps:
-
In the main T6 menu, under Access Control, select the Security Audit option:
- When clicking on Security Audit, a new window will open.

A spreadsheet will be displayed with the following columns:
Click to view the Columns
| Column | Description |
|---|---|
| Occurrence | Exact date and time of the event recorded in the system, with millisecond precision. |
| Author | User who initiated the recorded action. |
| Source | System module or component where the action occurred (e.g., Login, Permission, Object). |
| Action | Type of operation performed, such as Insert, Delete, Update, or Write. |
| Description | Explanatory text with details about the executed action, such as login performed or permission modification. |
| User | User impacted by the action, which may be the same or different from the author. |
| Application | Name of the application associated with the occurrence, if applicable. |
| Group | Group related to the occurrence, if available. |
| Role | User's role association in the system. |
| Feature | System functionality or resource affected by the action. |
| Object | Specific entity that was the target of the action, such as forms, reports, or accesses. |
| Context | Complementary data in structured format (JSON), containing information such as user session, object type, identifiers, among others. |
You can perform Copy, Export, and Filter actions on the data through the ribbon.
-
To copy data, select the cells you want to copy and click Copy in the ribbon;
-
To export the data, click Export in the ribbon. The spreadsheet will be downloaded in
.xlsxformat; -
To filter the data, click Filters in the ribbon;
-
Through filters, the user can use compound filters with two criteria connected by logical operators:
- And: both conditions must be true;
- Or: at least one condition must be true;
-
Each filter field includes:
- A comparison operator (e.g., “equals”, “greater than”, etc.);
- A value field to be filled in based on the column’s data type.
-
Click to view the Operator Types
| Operator | Description |
|---|---|
| is less than | Returns records with value lower than specified. |
| is less than or equal to | Includes the specified value and lower ones. |
| is greater than | Returns values greater than defined. |
| is greater than or equal to | Includes the specified value and greater ones. |
| contains | Returns records whose content includes the given expression. |
| does not contain | Returns records whose content does not include the given expression. |
| starts with | Returns records whose content starts with the given expression. |
| does not start with | Returns records whose content does not start with the given expression. |
| equals | Exact value. |
| different from | Excludes the given value. |
| is blank | Returns rows with no information in the column. |
| is filled | Returns rows with any value in the cell. |
- When clicking on Apply, the spreadsheet will display the data according to the applied filters;
- To return to viewing the spreadsheet with all data, click on Clear Filters to remove all applied filters.
¶ 2.2. Security Audit Table
The table that stores all security audit data is REP_LOG_SECURITY_TRAIL.
All records stored in this table are generated from Actions performed in a Source. The table below describes when each record type is generated:
Click to view the record type descriptions:
| Action (dscActionType) + Source (dscInformationType) | Description |
|---|---|
| Insert: | _____________________________________________________________________________________________________________________________________________________________________________________ |
| Insert + Application | When the user creates a new application in T6. |
| Insert + Feature | When new features are enabled in a group, and when users are added to groups with features they did not previously have. |
| Insert + Impersonate | When the user impersonates another user (WF). |
| Insert + Login | When the user logs into T6 successfully, regardless of authentication method. |
| Insert + Logout | When the user logs out of T6. |
| Insert + Permission | When the user enables read and/or write permissions on objects, through groups or directly on the user. |
| Insert + Permissions | When the user performs actions related to permissions and features, such as changing object permissions for a specific user and actions that add features to a user. (WF) |
| Insert + Role | When roles are added, either directly to a user or to a group. |
| Insert + user | When a user creates another user or group in T6. |
| Enter: | _____________________________________________________________________________________________________________________________________________________________________________________ |
| Enter + Impersonate | When the user impersonates another user within T6. |
| Enter + Login | When the user attempts to log into T6 but the credentials are incorrect (username or password). |
| Block: | _____________________________________________________________________________________________________________________________________________________________________________________ |
| Block + User | When a blocked user attempts to access T6. |
| Update: | _____________________________________________________________________________________________________________________________________________________________________________________ |
| Update + Object | When a user creates a new object in Explorer. |
| Update + Application | When a user changes the user profile type in an application. |
| Update + User | When a user changes information of another existing user; a record is also generated when a role is assigned to a user. |
| Update + Permissions | When a user changes permissions of another user (WF). |
| Update + OwnerShip | When a user transfers ownership of an object in T6. |
| Update + Role | When a user makes changes to an existing role in T6. |
| Leave: | _____________________________________________________________________________________________________________________________________________________________________________________ |
| Leave + Impersonate | When an impersonated user logs out and returns to the original user. |
| Create: | _____________________________________________________________________________________________________________________________________________________________________________________ |
| Create + Permission | When permissions are enabled for a user through an application. |
| Create + Object | When a Shortcut object is created. |
| Create + User | - |
| Delete: | _____________________________________________________________________________________________________________________________________________________________________________________ |
| Delete + XML | When the user deletes an XML object (WF). |
| Delete + User | When the user deletes another user in T6 (also generates a record with dscInformationType Object). |
| Delete + Role | When the user deletes a role in T6 (also generates a record with dscInformationType Object). |
| Delete + Object | When the user deletes an object, whether a form, user, group, role, etc. |
| Delete + Application | When the user deletes an application in T6. |
| Remove: | _____________________________________________________________________________________________________________________________________________________________________________________ |
| Remove + User | When a user is removed from a group in T6. |
| Remove + Role | When a role is removed from a user. |
| Remove + Permission | When a user's object permissions are removed. |
| Remove + Feature | When the user removes features from users or groups. |
| Remove + Application | When a user's access to an application is removed. |
| Execute: | _____________________________________________________________________________________________________________________________________________________________________________________ |
| Execute + Service | When a user calls an API using a Service token without needing to be logged in. |
| Send: | _____________________________________________________________________________________________________________________________________________________________________________________ |
| Send + Email | When a password reset email is sent to a user. |
For additional information, visit Log Retention
¶ 2.3. Audit Trail
The Audit Trail functions as a history of changes made to any cell in T6 forms. The audited values refer to the difference between the new value and the old value.
For example:
In a T6 form we have a cell with the value 220, the user changes the cell value to 200 and saves the form. The audited value will be -20.
To view the audit trail, follow these steps:
-
Within T6, with a form open, select a cell that contains a saved value;
-
Go to the Tools tab in the ribbon and in the Cells section select
 ;
; -
A side panel named Audit Trail will open;
-
The following will be displayed: Date, User, Type, Value, and Sub-Total;
- Date: Displays the date and time the operation was performed;
- User: Displays the user who performed the operation;
- Type: Indicates the type of change made (by formula, data load, data link, or manual change);
- Value: Displays the difference between the initial cell value and the current value;
- Sub-Total: Displays the final cell value;

For the tool to function correctly, the audit must be performed on leaf members. If it is performed on an intermediate-level member, only one row will be displayed, showing only the last change made to the cell value.

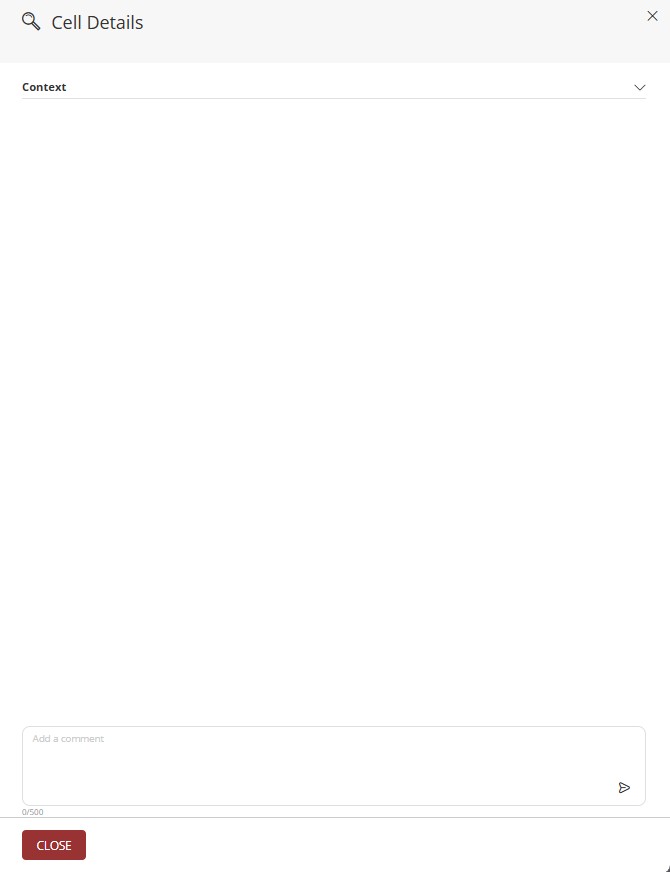
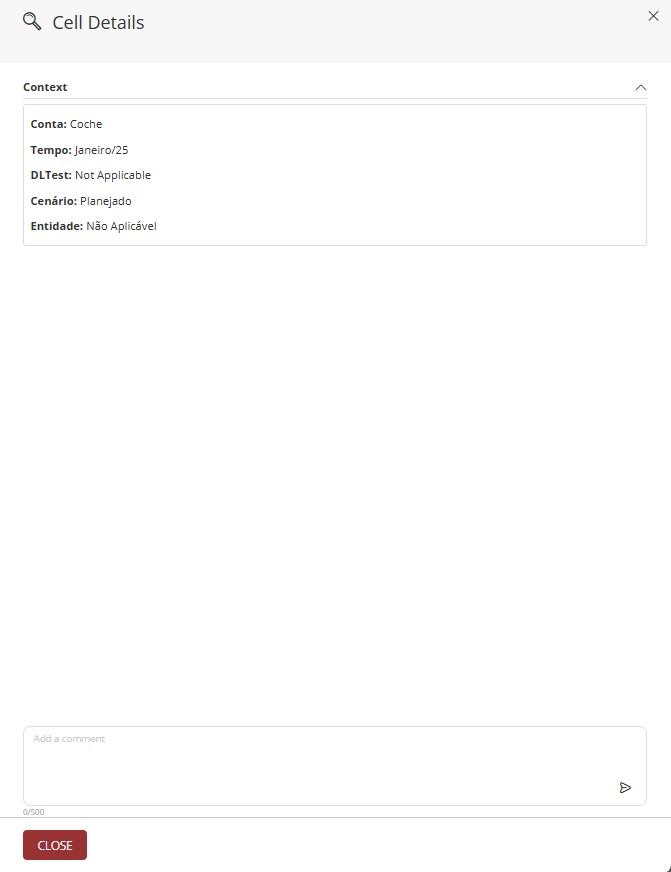
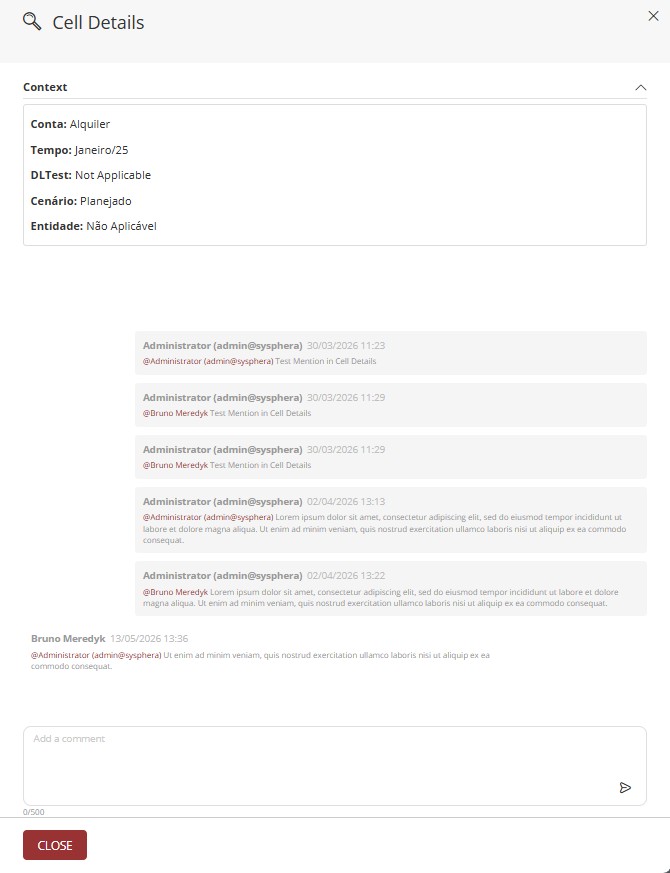
¶ 2.4. Cell Detail Audit
To view the cell detail audit, follow these steps:
- Within T6, with a form open, select a cell that contains a saved value;
- Go to the Tools tab in the ribbon and in the Cells section select ;
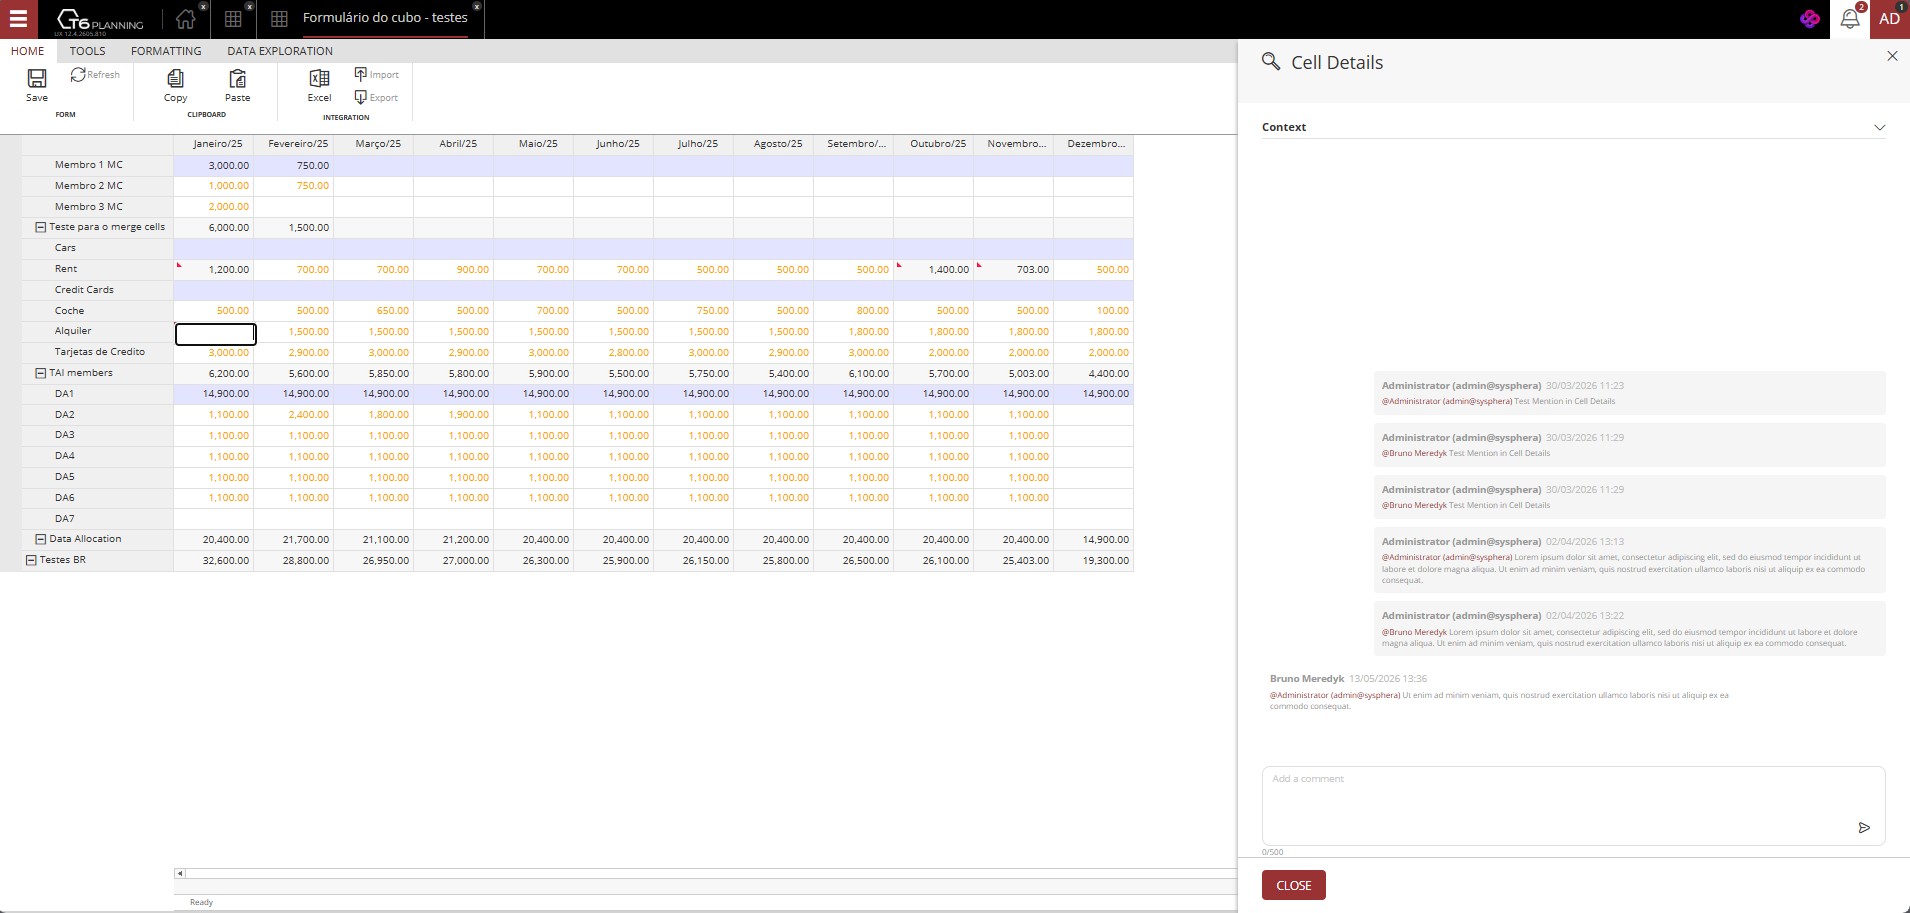
- A side panel named Cell Details will open;
- Initially, the panel will be collapsed, showing only details already added to the cell, if any;
- By clicking on ∨ the context will expand, showing the dimensions in which the cell is located;
→
- After typing the content, click the send icon, the added detail will be displayed in the panel and will be available for later viewing;

- By selecting the same cell and clicking again, you will be able to see the history of cell details in a chat format, where the details already added, the date and time they were added, and, in case of mentions, the user who was mentioned will be displayed;
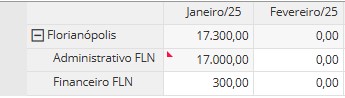
When adding details, the cell display in the form will be changed, showing a blue icon in the upper-left corner, as shown in the image below:
Through Cell Details, you can mention users using the
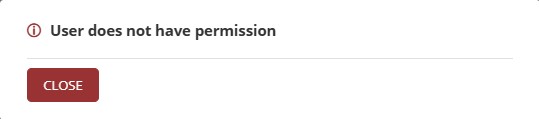
@usernamesyntax. When a user is mentioned, they will receive a notification informing them that they were mentioned in a cell detail, and by clicking View in the notification, the user will be redirected to the form and cell where they were mentioned.

If the mentioned user does not have permission to access the form where they were mentioned, when clicking View in the notification, an error message will be displayed.
¶ 2.5. Cell Breakdown Audit
When clicking Cell Breakdown, a side panel will open, where the selected context is displayed, and just below, a table with the fields Description, Operation, and Value.
- Initially, no data will be displayed;
- Let's insert the requested data;
- The panel includes a Total field, which shows the final value to be displayed in the selected cell;
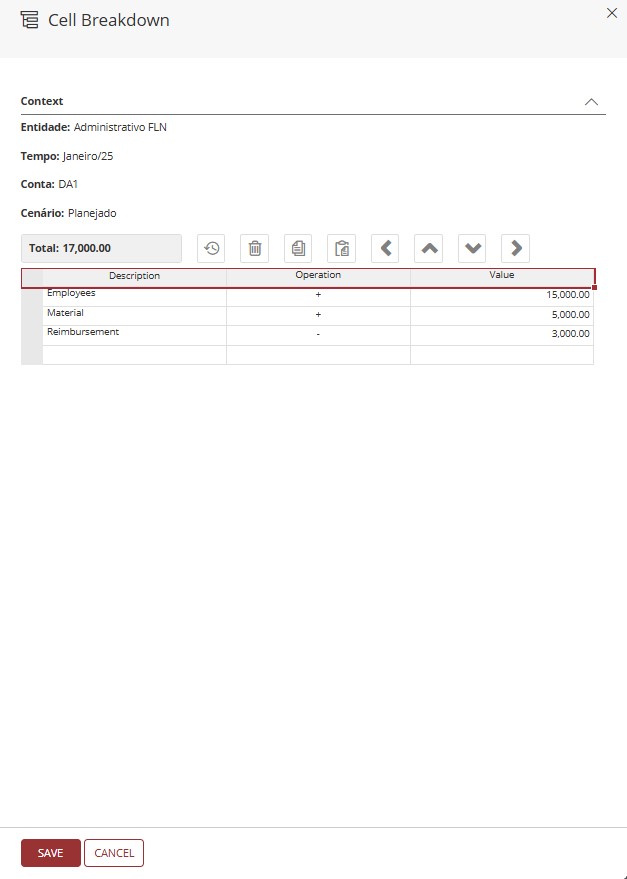
Click Save to apply the value changes and close the panel;
When changing the value of a cell using the Cell Breakdown tool, it becomes a calculated cell, preventing changes via the form.
When adding values to a cell via Cell Breakdown, the display will be changed, showing a red icon in the upper-left corner, as shown in the image below:
¶ 2.6. Data Table Audit
To view the Data Table Audit, follow these steps:
- During creation or editing of the data table, it is necessary to enable the flag
 ;
; - To view the audit, you must have a data form created from the data table with the flag enabled;
- Open the data form and select the row you want to audit, then click ;
- A side panel named Audit will open;
- The content of the selected row will be displayed, including the header, the data contained in the cells, the Operation, the User, and Update Date;
Only data entered after the Enable Audit flag has been activated in the data table will be shown in the audit. If the selected form contains data entered before the flag was enabled, it will not be possible to view the audit for this data.
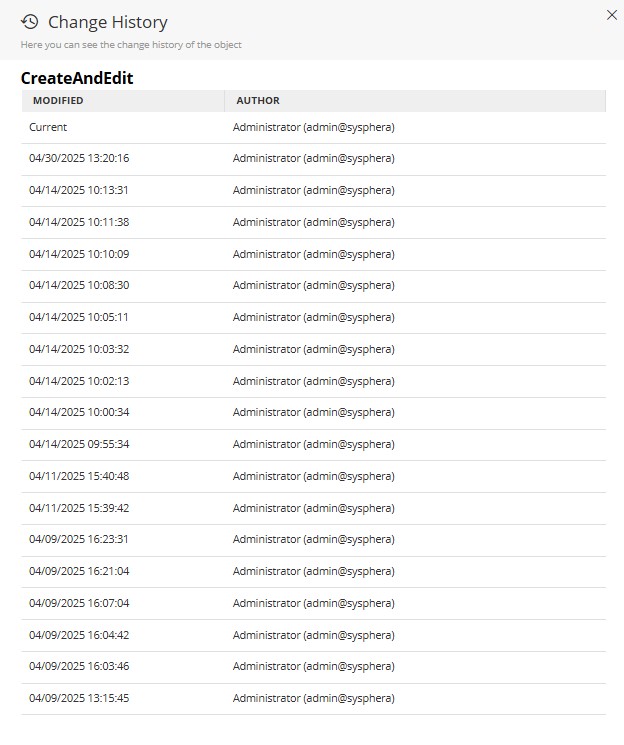
¶ 2.7. Object Logs
Within T6, we also have a history of changes to the structure of an object.
To view it, follow these steps:
- In the T6 main menu, go to Settings and select the Explorer option;
- Select the object you wish to view the history of;
- In the explorer ribbon, select the View tab;
- With the object selected, click on History in the explorer ribbon;
- A side panel will open, where you can view the Modification Date and the Author of the modification;
¶ 2.8. Error Logs
As in any large-scale system, sometimes unexpected errors can occur. T6 audits and saves the information that caused these errors, facilitating communication between the client and the support team.
To view the error log page, follow these steps:
-
In the T6 main menu, go to Settings and select the Log option;
-
A new page will open in T6 displaying the list of errors;
-
The listing will show Date, User, Layer, Message;
-
To view the details, simply double-click on a specific row;
-
A side panel named Log Administration will open;
-
It will display the following information:
- Date: Displays the date and time of the occurrence;
- User: Displays the user who attempted to perform an action that resulted in an error (a user may not always be linked);
- Layer: Displays the layer where it occurred (LOG, DAO, COLAP, Control, or Data Provider);
- Version: Displays the version and build of T6 at the time of the occurrence;
- Detail: Displays the full error message;
¶ 2.9. Model History
Allows all changes regarding the structure of the model in T6 to be recorded. Thus, when creating a new dimension or adding a new member to a dimension, these changes are stored.
The entire model structure is saved in XML format.
To access the model history, we will follow these steps:
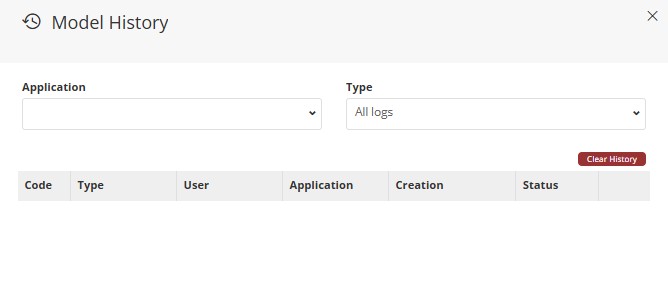
1. In the main T6 menu, go to Modeling and select the option Model History;
2. A side panel will open named Model History;
3. By default, no record will be displayed until an application is selected;
-
We will select the desired application through a dropdown, as well as the type of record, which by default shows All Records;
- In Type, we can select All Logs, Cube, or a Specific Dimension;
4. If you want only a specific type of records from an application to be displayed, it is possible to select through the Application and Type dropdowns;
5. The listing displays:
-
Code: Code generated when performing an insertion;
-
Type: In type we have the name of the dimension, or Cube;
-
User: Displays the user who performed the insertion;
-
Application: The T6 application;
-
Creation: Displays the Date and Time when the insertion occurred;
-
Status: Displays the status of the insertion, there are 3 possible statuses:
- Synchronized: A cube that has been saved and published;
- History: These are histories of cubes already published, we can delete a specific historical record by clicking
 next to its name in the listing; We can also delete all historical records at once by clicking
  located above the listing;
 - Valid: A cube that has been saved and not published. If you do not want to publish the cube with the saved changes, you can click
 to undo the changes;
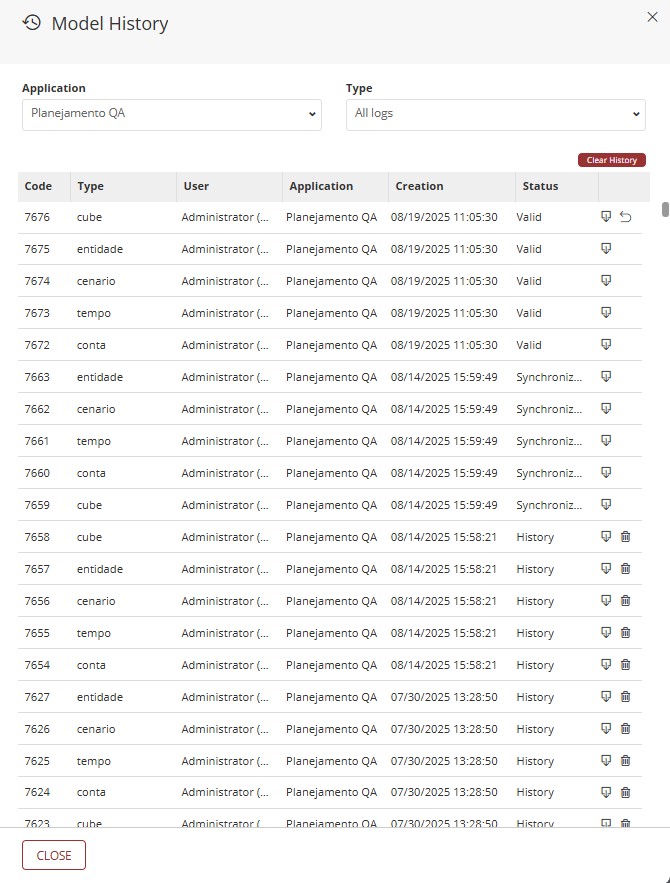
We can download a specific record by clicking
next to its name in the listing. When clicking export, a file in .XML format will be downloaded;
¶ 3. Q&A
Frequently Asked Questions
1. What is auditing in T6?
Auditing consists of storing details about changes and/or actions performed on any data considered critical within the T6 solution, such as changes on the Security screen or value changes in form cells.
2. What permission do I need to access the security audit?
To access the security audit, the user must belong to a Global Group with the Security Audit feature enabled.
3. What audit types are available in T6?
T6 provides 9 audit types:
- Security;
- Audit Trail;
- Cell Detail Audit;
- Cell Value Detail Audit;
- Data Table Audit;
- Object Logs;
- Formula Logs;
- Error Logs;
- Model History.
4. How do I enable security auditing?
To enable security auditing, follow these steps:
- In the T6 main menu, go to Settings;
- Select Parameters;
- In the side panel, choose Global;
- Expand the System section;
- Locate the Enable Security Audit parameter and turn the switch on.
5. Where can I view security audit logs?
To view security audit logs:
- In the T6 main menu, go to Access Control;
- Select Security Audit;
A new window will open with a spreadsheet containing the records.
6. How can I view a cell change history?
To view a cell change history:
- With the form open, click the target cell once;
- Go to the Tools tab on the ribbon;
- In the Cells section, click the Audit icon;
- A side panel will open with the selected cell change history.
7. What does the value shown in the audit trail mean?
In the audit trail, the displayed value represents the difference between the old value and the new cell value.
For example, if a cell changed from 220 to 200, the audited value will be -20.
8. Does the audit trail work for all member types?
For auditing to work correctly, it must be performed on leaf members.
In some cases, auditing can be used on intermediate-level members, but only the last change will be displayed.
9. Can I see the history of details added to cells?
Yes. In the Cell Details panel, click the history icon to view all detail changes.
10. How do I enable auditing for data tables?
To enable auditing for data tables, during data table creation or editing, enable the Enable Audit flag.
11. Can I audit data inserted before auditing is enabled?
No. You must open the data table edit screen and enable auditing before inserting data. Only data inserted after enabling the "Enable Audit" flag will be audited.
12. How can I view object history and what does it show?
To view object history:
- In the T6 main menu, go to Explorer;
- Select the target object;
- On the ribbon View tab, click History;
A side panel will open showing the change date and the user responsible for the change.
13. Where can I find system error logs?
To access system error logs:
- In the T6 main menu, go to Settings;
- Select Log.
A new window will open with the error list, including date, user, layer, and message details.
14. How do I access model history?
To access model history:
- In the T6 main menu, go to Modeling;
- Select Model History.
A side panel will open showing the history of model structural changes, such as dimension and member creation.
15. Can I export audit data?
Yes, you can copy selected data or export the whole spreadsheet in .xlsx format from the ribbon by clicking Export.
After clicking export, the download starts automatically.
16. How can I apply filters to audit data?
To apply filters to audit data:
- After opening the audit spreadsheet, click Filters on the ribbon;
- Configure compound criteria using logical operators (And/Or) and comparison types (for example, "equals", "greater than", etc.);
- Click Apply to filter data according to the defined criteria;
- To remove filters and view all data again, click Clear Filters.
Available logical operators:
- And: all criteria must be met.
- Or: at least one criterion must be met.
Available comparison types:
- Equals: checks whether the value equals the specified value.
- Different from: checks whether the value differs from the specified value.
- Greater than: checks whether the value is greater than the specified value.
- Less than: checks whether the value is less than the specified value.
- Contains: checks whether the value contains the specified text.
- Does not contain: checks whether the value does not contain the specified text.